
Dashboard
Surveys Dashboard
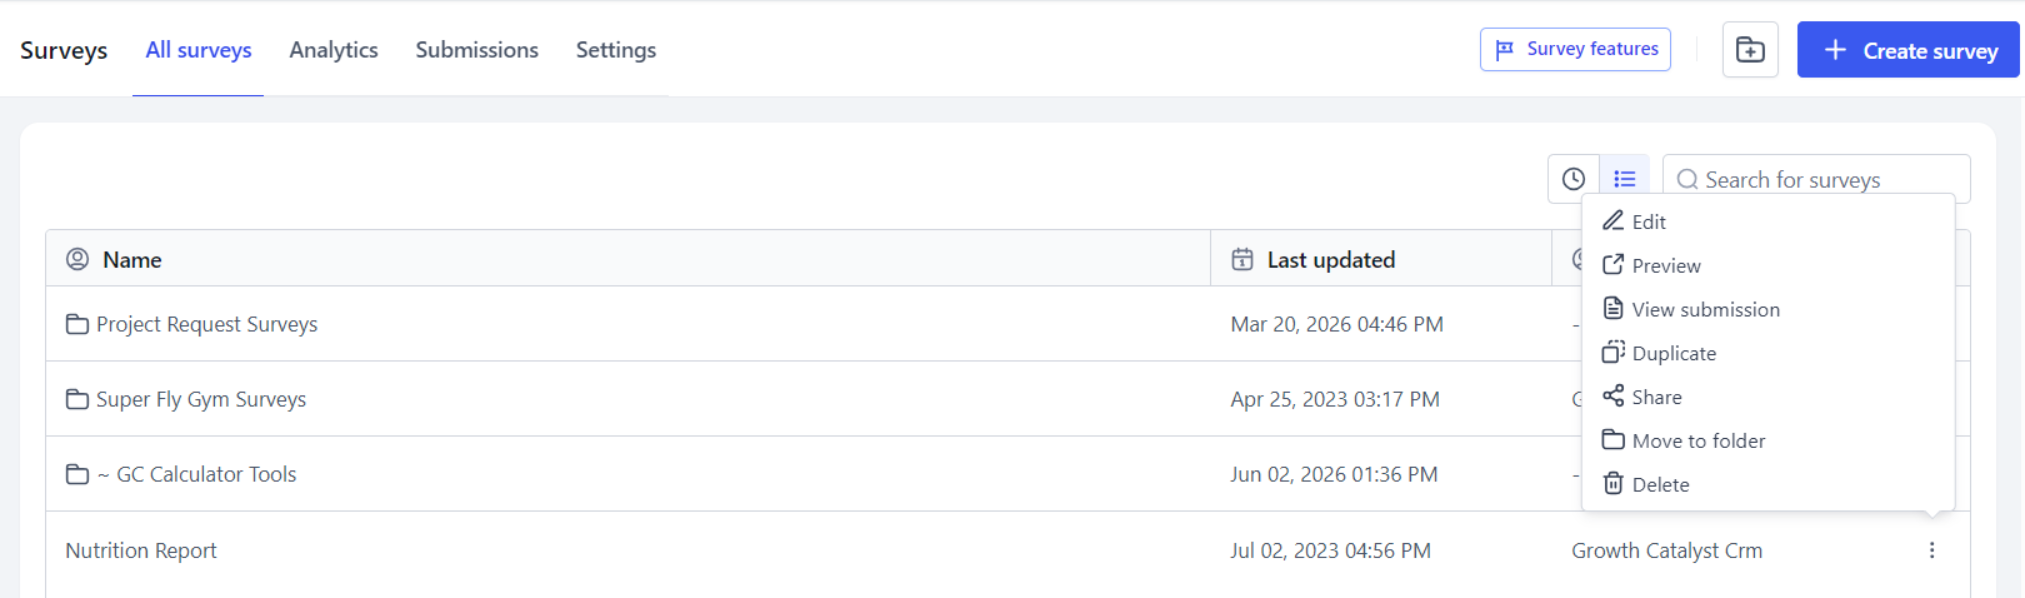
Go to Sites > Surveys to view existing surveys and folders. You can toggle between List view or Recent view by clicking the icons to the left of the search box.
Ellipsis Menu Options
Click on the ellipsis menu (⋮) next to a survey to view available options. These include Edit, Preview, View Submission, Duplicate, Move to Folder and Delete. Once you select an option, follow the on-screen instructions.
Folders
Create a Folder
Click on the Create Folder icon in the top right corner. Enter a folder name and press Confirm (or cancel).
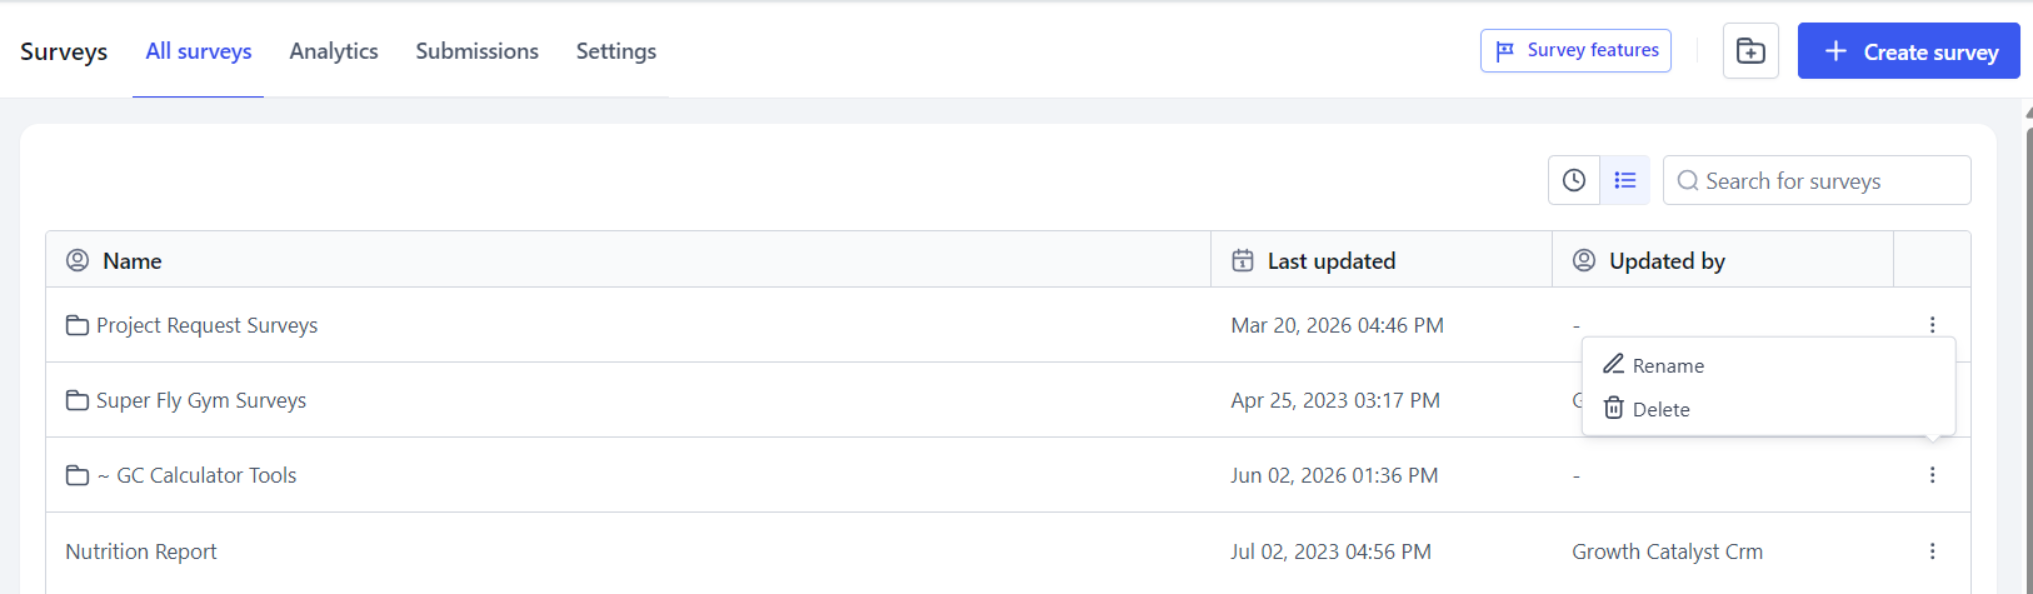
Rename or Delete a Folder
To rename or delete a folder, click on the ellipsis menu (⋮) next to the folder, select Rename or Delete as required, and follow the on-screen instructions.
Creating a Survey
Create a New Survey
Go to Sites > Forms > Survey. In the top right corner, click on the green Create New Survey button. Click Save Survey regularly to save changes.
Remove Agency Branding
Click on the Styles and Options icon in the top right corner. Click on the Styles tab in the right-hand panel, scroll down to the Miscellaneous section and toggle off Agency Branding to remove the Growth Catalyst CRM logo.
Name the Form
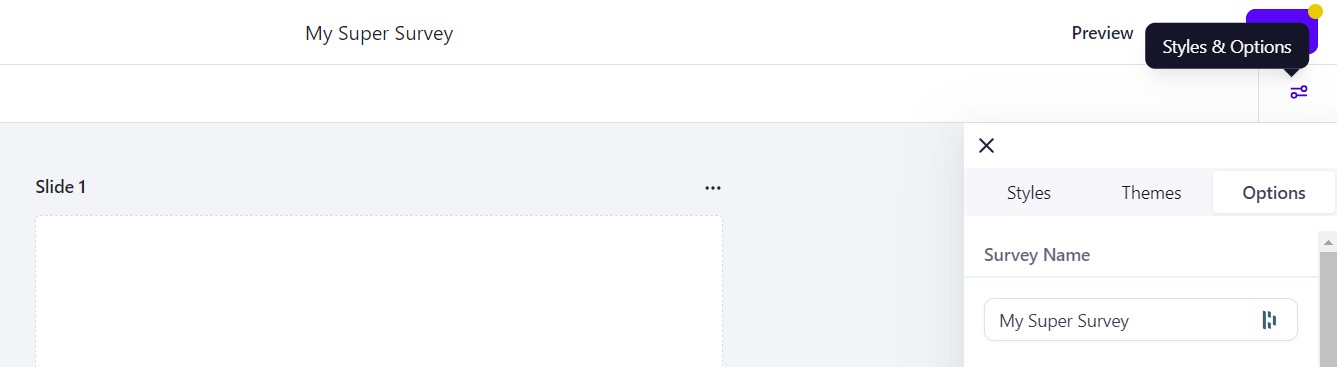
Click on the Styles and Options icon in the top right corner. Click on the Options tab and enter a name for your survey.
Survey Slides
Add a Slide
If you add a new slide, click on the Plus icon below an existing slide.
Renaming Slides
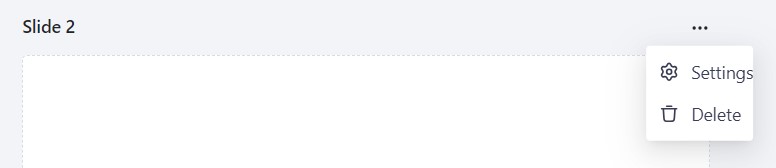
To rename a slide, click on the ellipsis menu (⋯) above the slide and select Settings. Change the name of the slide in the right-hand panel and either click the arrow at the top to exit or click the surrounding grey space.
Delete Slides
If you want to delete a slide, click on the ellipsis menu (⋯) above the slide and select Delete.
Reorder Slides
You can reorder slides by clicking on the slide and dragging them to the new position.
Survey Questions
Add Fields and Questions
To add questions to the survey, drag and drop the required questions from the Fields tab in the right-hand panel. You can either add Standard fields or your own Custom Fields. You can also reorder questions/fields by dragging them within the form.
You can also create custom fields directly in forms or surveys but they can only be edited in settings. Go to Settings > Custom Fields to edit or delete a custom field. See the Custom Fields page for more details/instructions.
Required Questions
To make a question required, click on the field and change the option in the right-hand pop-up menu. Click on the gray area surrounding the form to exit the pop-up menu. Required questions are marked with an asterisk.
Edit Standard Fields
You can edit the appearance of standard fields within a specific survey. After you have dragged a field onto your form, click on the specific field and the right menu will now allow you to change the field text.
NOTE: You can't make permanent edits to fields, just survey by survey.
Field Description
You can add field description, which means you can add additional text than just the standard label. This works particularly well if Remove Field Labels is toggled off (see Survey Options below). Click on the field and select Edit Description. Add and format the desired text and press Save.
How to Delete a Question
If you want to delete a question, click on the specific question/field on the survey and click the cross in the top right corner of the highlighted box.
Phone Number Compliance
To ensure compliance with GDPR and A2P regulations, if you add a phone number field to a form, the system will automatically add a terms and conditions consent check box (you can also add it separately if needed). You can edit/customize the wording in the right hand properties panel.
Click here for more information about phone compliance.
Slide Logic
Slide Logic
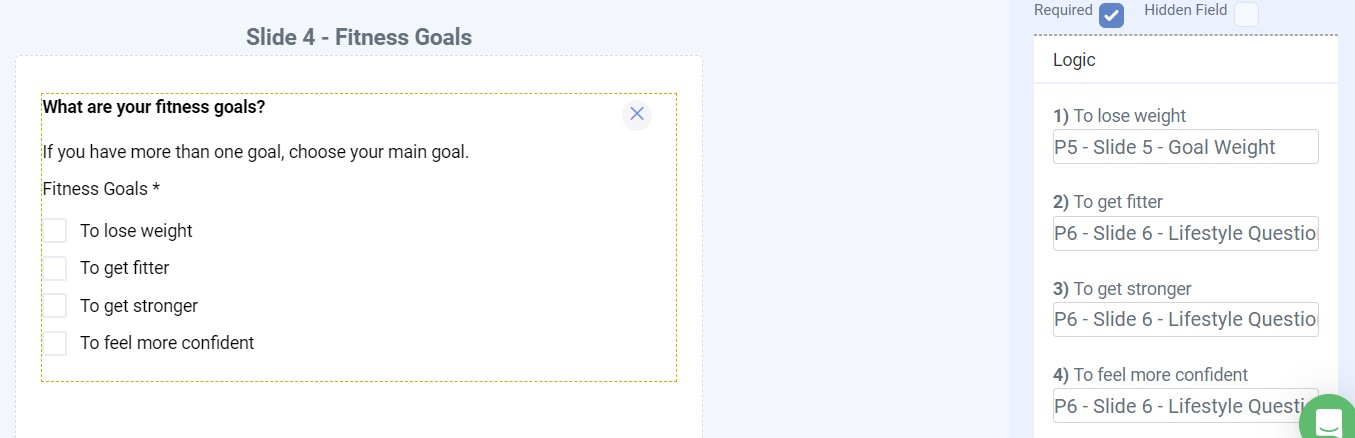
You use can logic with surveys so that questions asked depend on the answers given. Once you have added question with options (such as radio or checkbox question), click on the question to see the logic options in the left-hand panel. Renaming slides can be particularly helpful when using logic.
Survey Appearance
Style the Survey
To edit the appearance of the body of the form, click on the Styles and Options icon in the top right corner and select the Styles tab. In the Style Survey section, there are options to edit the form background color and tranparency, border and color, corner radius, form width, padding and shadow.
Remove Field Labels
To remove the field labels, click on the Styles tab and toggle off Show Label in the Layout section.
Input Style
You can select whether you want the input style to be Line or Box. Click on the Styles tab and select the Input Style from the drop-down menu.
Format Field Style
Also in the Styles tab, you go the Field Style section to edit the background color, border (type, thickness and corner radius). There are also options to edit the color, font family, font size and font weight of the Labels and Placeholders. If you cannot see you desired font in the drop down list, type the name of the font into the box,
Footer
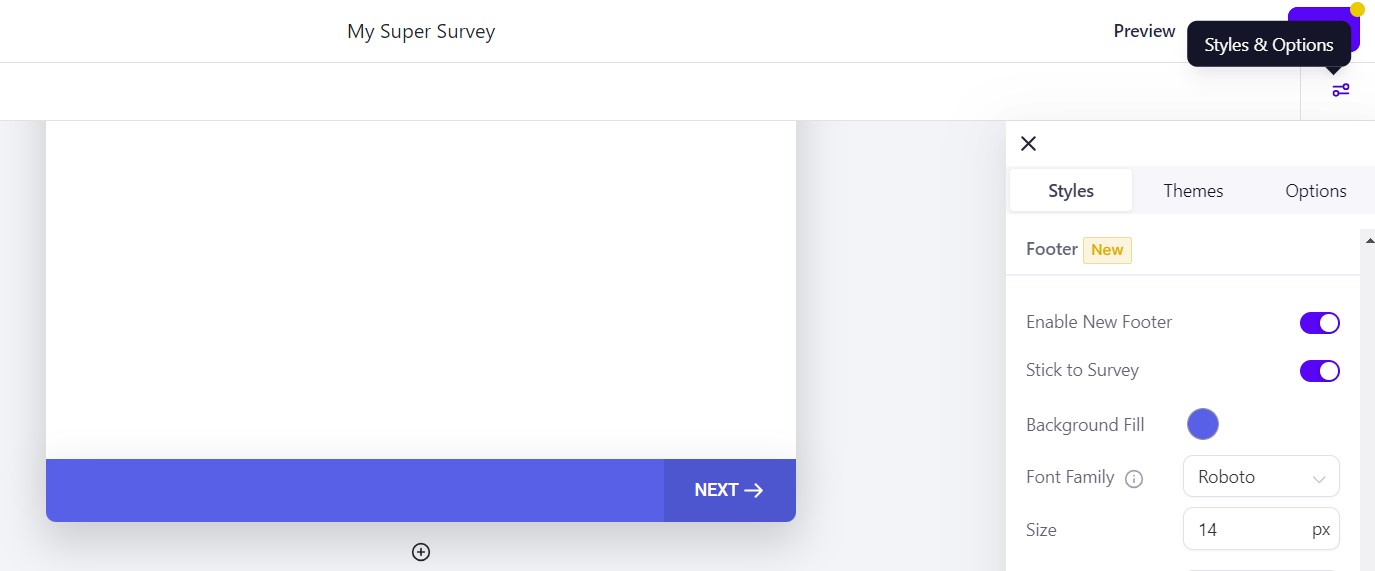
To customise the appearance of the footer, click on the Styles tab and toggle on Enable New Footer. You can select whether you want the footer to stick to the survey and whether you want to display the progress bar. There are also options to edit the background color, and font family and size. You can edit the button type and position, fill color, text color, and button text.
Background and Header Images
If you are using the form as a stand alone page (and not adding to a funnel or website), you may like to add a background image or a header image. The background image is intended to cover the entire page, providing a visually appealing backdrop for the form and the header image is designed to cover the entire width of the form and remains positioned at the top of the form.
To add a background image or header image, click on the Styles tab. You can either drag a file or click to upload one.
The image can only be seen on the live survey (not the survey builder screen). To view the image, click on the Preview option.
Themes
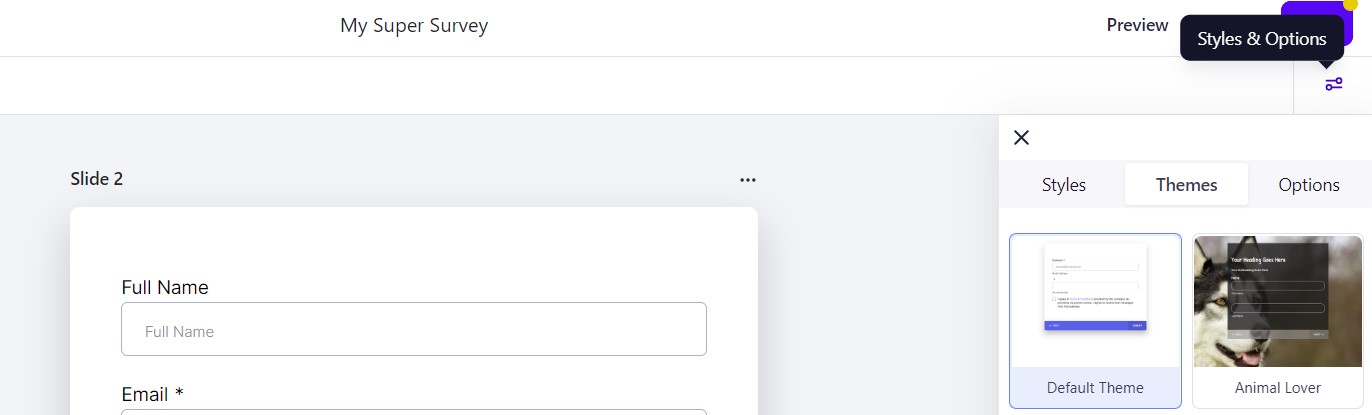
There are also pre-built themes available if you want some inspiration for your survey design. Click on the Styles and Options icon in the top right corner and select the Themes tab. Choose the theme you want to use and select Use Theme.
Additional Design Options
To make additional appearance changes to the form, you can add Custom CSS to the Styles tab.
Survey Completion
Action On Submit
When the contact submits the survey , you can either send them to a different webpage (Open URL) or display a message (such as a thank you message).
- To change the submission settings, click on the Options tab in the right-hand panel and go to the On Submit section.
- Choose from Message or Open URL.
- Once selected, add the message or URL to the box below.
If the form is embedded in a Growth Catalyst CRM page, the Redirect Action in the funnel or website builder will supersede the form builder On Submit action.
Submit Message Appearance
If Message is selected as the On Submit action, there are options to format the text, background color, font family and font size.
Additional Survey Options
Meta Pixel
Click here for more information on adding your Meta pixel to a form or survey.
Sticky Contact
Sticky Contact allows you to save cookie/s from a lead and will autofill information across multiple forms/surveys that they had previously entered so leads don't have to enter it twice if there are multiple steps. This is especially useful, for example, if you have an initial opt-in leading to a calendar/appointment page or an Order Form.
Go to Options > Sticky Contact. and toggle the option on or off.
IMPORTANT! Sticky contact should not be used if more than one contact is completing a survey from the same device. If a second person accesses a sticky contact survey from the same device, the previous contact's information will populate and the system will add the new information to the wrong contact.
Using the Survey
Preview/Test the Survey
Click on Integrate Survey and select the Link tab. Click the Open Link icon.
This link is live so you can enter in mock data for your form which will allow you to test the form/survey and see how the information looks in the contact profile. We recommend that you copy the link and paste it into an incognito browser first.
Add the Survey to a Funnel
If you want to embed a form or survey on a Growth Catalyst CRM funnel or website, you add it directly as an element in the funnel or website builder. Once added, make sure you set the Redirect Action.
Click here for more information on adding forms or surveys an element in funnels.
Embed the Survey
If you want to embed the survey on an external website, you can get the embed code by clicking on Integrate Survey. If you are embedding this survey on another website, make sure you have entered the required details under On Submit (either a URL or thank you message).
Survey Submissions
Survey Submissions
When a contact completes a survey, their answers are stored within their contact record. Click on Contacts and search for the contact name. Standard field answers can be found in Contact and General Info. Custom field answer
You can look within specific contact records under Additional Information on the left side of their contact page in Contacts.
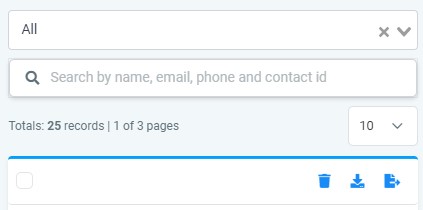
You can find all form answers under Sites > Forms > Submissions. Using the dropdown menu, you can select a specific form. You can also search for a specific contact (by name, email, or phone). You can also delete answers and you can download specific submissions or export all submissions of all forms as a CSV file (and open them in something like Google Sheets, Excel, or Numbers to see/sort the data in whichever way you want).
Survey Analysis
For survey statistics, go to Sites > Surveys > Analyze. Here you can see a graph showing Total Submissions. You can change the date range in the dropdown on the top right.
Scroll down to the Survey section and you will see a list of your forms and the number of submissions for each. You can click the View Submissions hyperlink to view the submissions for each form.
Survey Submission Automations
Survey Submission Workflow
When someone has submitted a survey, you might want to automate an event (such as adding a contact tag or adding them to another workflow).
- Go to Automation > Workflows and either create a new workflow or open an existing one.
- Click Add New Trigger and select Survey Submitted. Add filter Survey Is and select your form.
- Click the + to add a new action to the workflow. Use the drop-down menu to choose one or more actions to occur, such Add a Contact Tag or Add to Workflow.
- Add any other required steps.
- Toggle on Publish and press Save.