
Spread to Columns
Spread to Columns
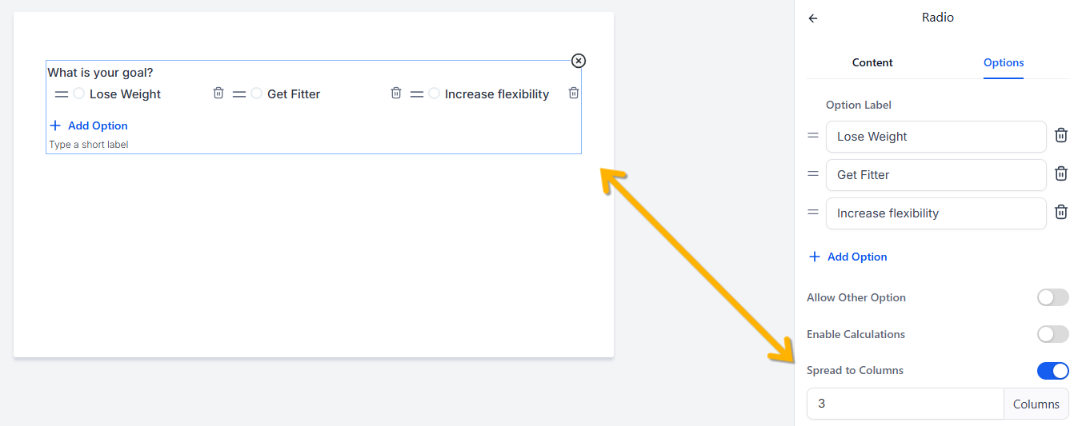
To display radio or checkbox options side by side instead of in a vertical list, click on the question, then open the Options tab in the panel on the right. Toggle Spread to Columns on, and enter the number of columns you’d like to use.
Payments
Payments
You can take payments with in a form, which allows you to add more fields than a funnel order form. Payment forms can be used as a standalone form or as an element within a funnel.
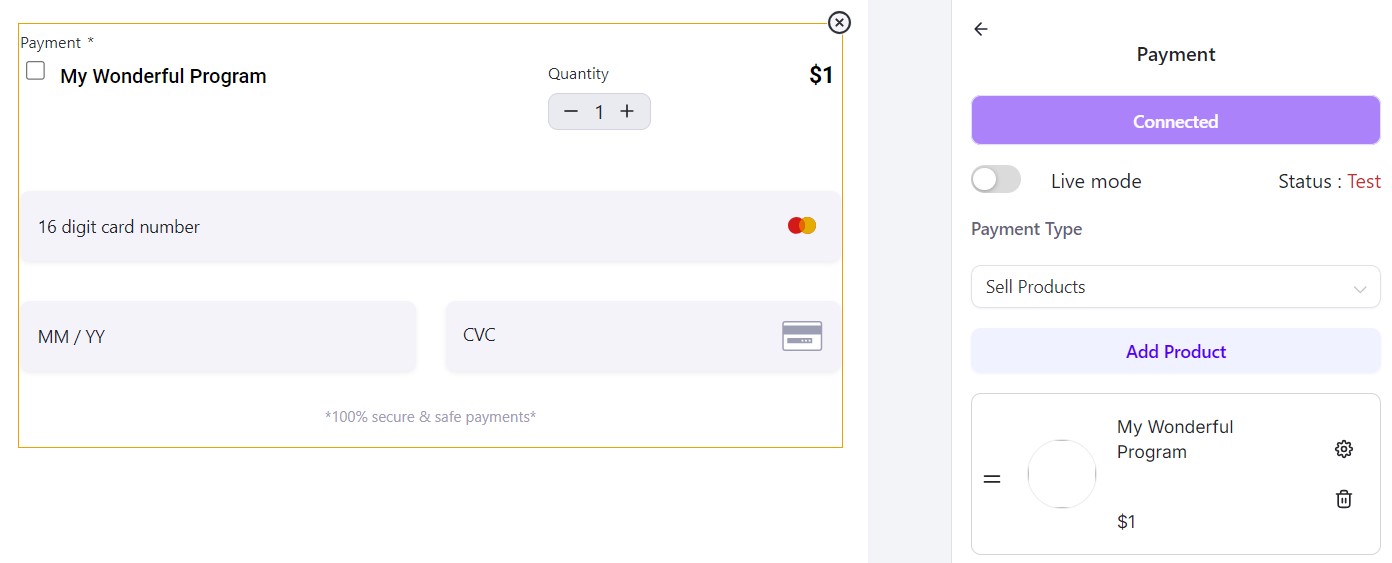
- To take payments inside a form, click on the + Add Form Element button in the top left-hand corner and drag a Payment field onto the form.
- Select the Payment Type from the drop down (Sell Products or Custom Amount - for example, where you might take charity donations).
- To add product(s) to the form, click on the payment field to display the right hand panel. Click Add Product to add a product. Select the product from the drop down menu and choose whether to show the description and/or image. Once complete, press Add Product.
Click here for more information on creating products.
To edit a product, click on the Settings/Gear icon. To delete a product, click on the Trash Can icon.
- Enter a Label and select whether the field is required.
- Choose the required Layout Settings and change the Footer Information as needed.
Email Validation
Email Validation
When you add an email field, you have the option of validating a contact's email address before they are able to submit the form. Click on the email field and check the Validate Email box in the right hand panel. Users will then need to verify their email before they can submit the form.

Phone Country Picker
Phone Country Picker
When you add a phone field, you can also choose whether to enable the Country Picker option. Click on the phone number field to change the option in the right-hand menu. If all of your contacts will have the same country calling code as your account, then you can disable this option. If you work with any contacts that might have a different country calling code, then you will need to enable this option.

Phone Terms and Conditions
Phone Terms and Conditions
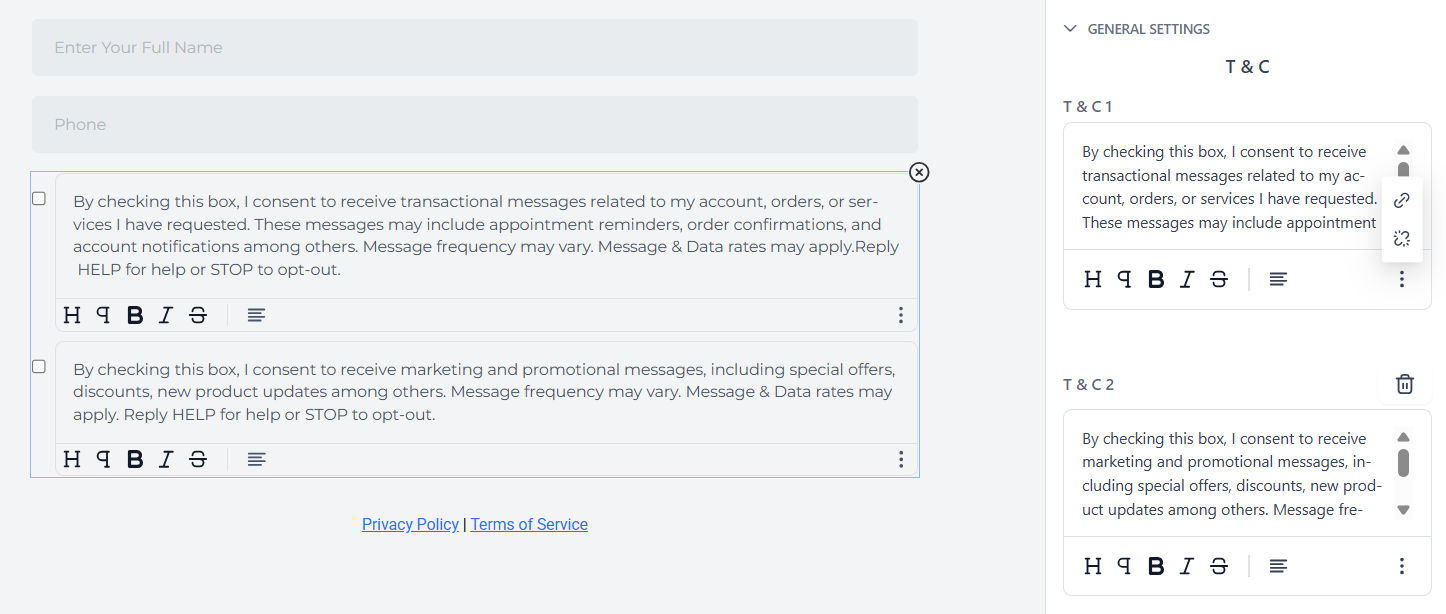
When you add a phone field, it the form will automatically add two Terms and Conditions fields to ensure that you are compliant with A2P 10LDC and GDPR regulations (one to consent to transactional messages and another to consent to marketing messages). To edit the hyperlink, highlight the required text, and click on the ellipsis menu (⋮). You can also customize form the text, and chance the text and link colors.
Sticky Contact
Sticky Contact
Sticky Contact allows you to save cookie/s from a lead and will autofill information across multiple forms/surveys that they had previously entered so leads don't have to enter it twice if there are multiple steps. This is especially useful, for example, if you have an initial opt-in leading to a calendar/appointment page or an Order Form.
Go to Sites > Forms > Settings > Sticky Contact and toggle the option on or off.
IMPORTANT! Sticky contact should not be used if more than one contact is completing a survey from the same device. If a second person accesses a sticky contact survey from the same device, the previous contact's information will populate and the system will add the new information to the wrong contact.
Meta Pixel
Meta Pixel
Click here for more information on adding your Meta pixel to a form or survey.
Duplicate Contacts
Avoid Duplicate Contacts
Sometimes when you send a contact a form or survey to complete, they use a different email address and it can create a duplicate contact. To avoid this issue, when you email a form link to a contact, you can add their contact id by adding the utm code ?contact_id= to the end of the form link (change the comma to a period to use).
If the contact then uses new contact information, their contact card will update.