
The tag feature is a great way to organize your contacts. Adding and removing tags will help you determine what the contact is interested in, what membership level they are on, what stage the contact is at (similar but more granular than a pipeline stage). You can add more than one tag to a contact.
Tags can be used in Contacts to Filter your contacts list to perform a Bulk Actions or to save a Smart List. Adding or removing tags can also trigger Workflows.
Creating a Tag
Create a Tag in Settings
- Go to Settings > Tags. In the top right-hand corner, click on the blue button.
- Enter a tag name and press (or Cancel).
Tags can only contain text (letters, numbers and spaces) and cannot contain special characters.
Create a Tag When Adding
You can also create a tag at the same time as adding it to a contact or within a workflow. When searching for the tag to add, if the tag does not already exist, there will be an option to create it.
Tags Dashboard
Tags Dashboard
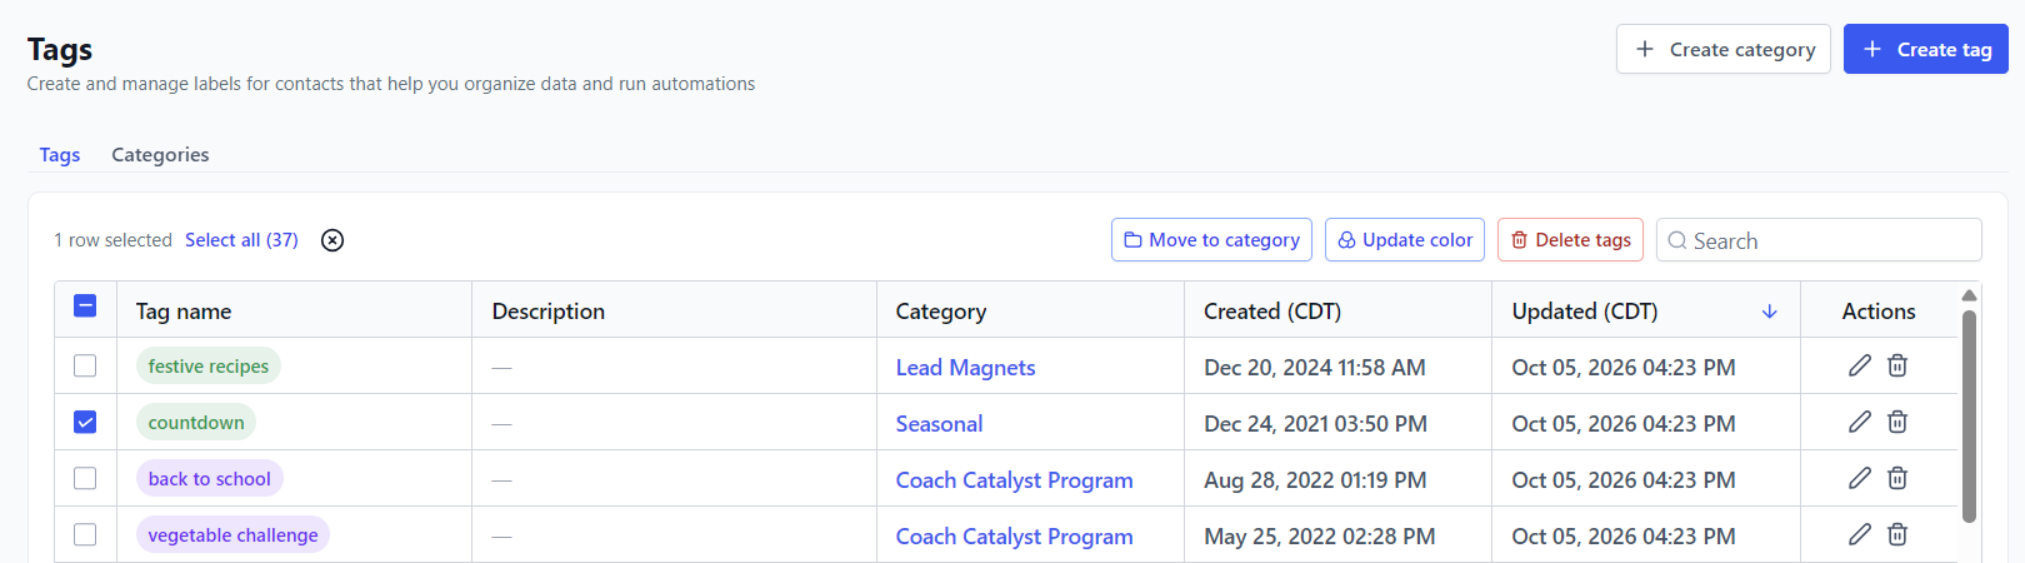
The Tags dashboard shows all the tags you have created. From here, you can organize them into categories and change their color.
Go to Settings > Tags to view existing tags. You can sort the list by clicking a column heading.
Edit a Tag
To rename a tag, click the Pencil icon at the end of its row and follow the on-screen instructions.
Move Tags to a Category
- Select the tags you want to move and click on the Move to Category button in the action bar.
- Select the category from the dropdown list and press .
The category must be created before you can move tags into it.
Delete a Tag
To delete a tag, click the Trash Can icon at the end of its row and follow the on-screen instructions. To delete multiple tags, select the tags you want to delete and click on the Delete Tags button in the action bar.
Deleting a tag is permanent. It is removed from every contact that carries it, and any workflow that adds, removes or is triggered by that tag will stop working.
Categories
Create a Category
Categories help you organize your tags by type.
- Go to Settings > Tags and click on the button.
- Enter a category name and, if desired, a description.
- Press .
Colors
Update Tag Colors
Tag colors also show in your contacts list, which makes tags easier to spot at a glance.

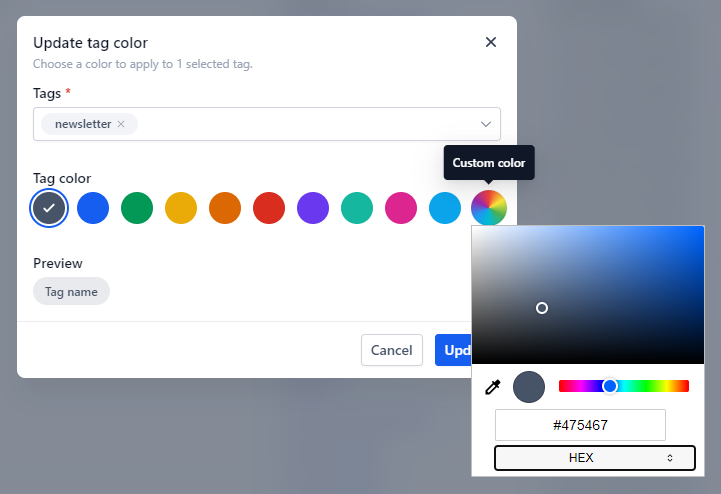
- Select the tags you want to update and click on the Update Color button in the action bar.
- Choose one of the ten standard colors, or add a custom color by clicking on the color wheel. For a custom color, switch between RGB, HSL and HEX by clicking on the option below the color picker, then enter the required value.
- Press .
Manual Actions
Individual Contacts
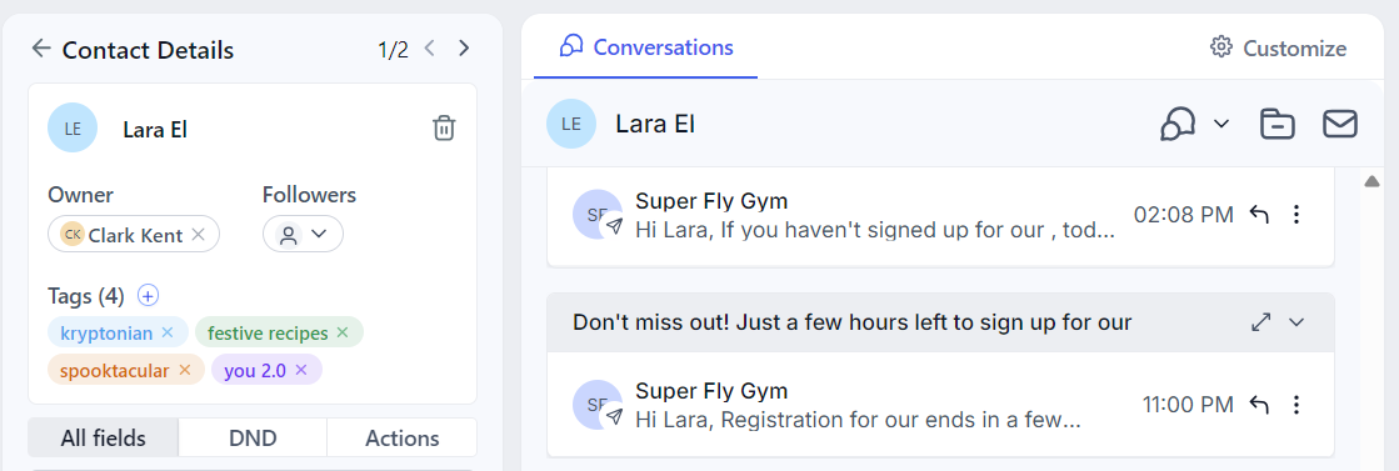
- Go to Contacts and open the contact's contact card.
- In the header section of the left-hand panel, click on the + next to Tags.
- Select the tags you want to add. You can search by tag name or expand the categories.
- Click .
To remove a tag, click on the x next to it.
Bulk Action
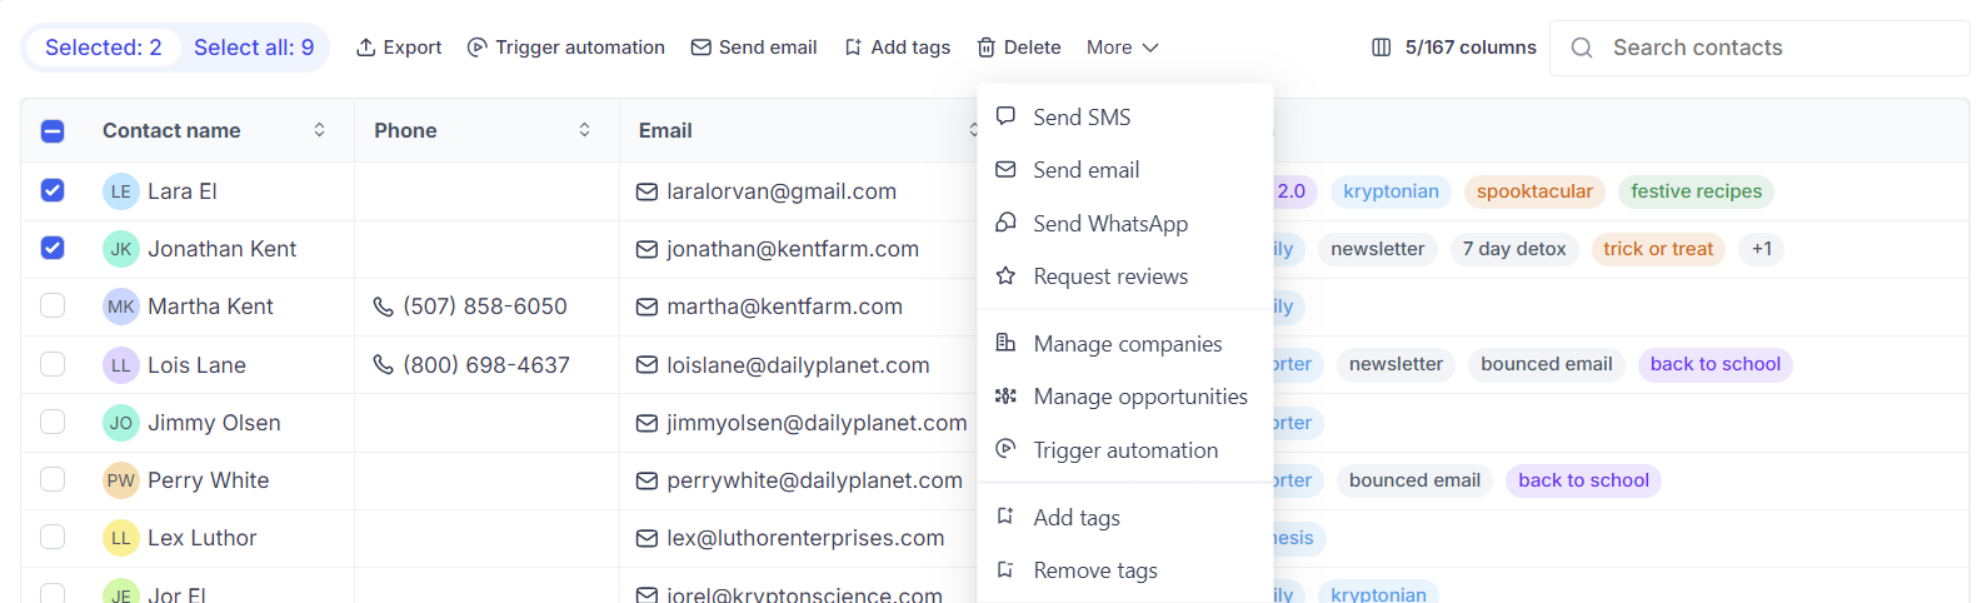
- To add or remove a tag from multiple contacts, go to Contacts and select the contacts you want.
- In the action bar, click on More and select Add Tags or Remove Tags.
- Enter an action name. This is for internal purposes, so that you can identify the action on the Bulk Actions dashboard and follow its progress.
- Select the tags you want to add or remove and press or to finish.
Import
You can add tags when importing a list of new contacts. The CSV file you upload can contain specific tags for each contacts or you can apply a tag to the list as a whole on the final import page.
Click here for more information about importing contacts.
Automations
Add or Remove Tags in Workflows
You can add and/or remove tags to a contact as an action step in workflows. For example, you can prompt a tag to be added or removed on events such as form or survey submission, order form sale, and more.
- Go to Automation > Workflows and either create a new workflow or open an existing one.
- If required, add a workflow trigger.
- Click the + to add a new action to the workflow and choose either Add Contact Tag or Remove Contact Tag from the right-hand menu. Select the desired tags from the list. To create a new tag or search existing tags, use the search box. Press Save Action when complete.
- Toggle on Publish and press Save.
Trigger Workflows from Tag Actions
Adding or removing tags can also trigger Workflows. When you either add or remove to a contact, you might want to automate an event (such as adding them to Coach Catalyst or adding them to a newsletter workflow).
- Go to Automation > Workflows and either create a new workflow or open an existing one.
- Click Add New Trigger and select Contact Tag, then add a filter to select whether the tag is Added or Removed and select the required tag.
- Add any action steps you want to happen next, such as Send Email.
- Finally, toggle on Publish and press Save.