
Create Products
Products are what you sell through funnel order forms, payment links, invoices and the online store. A product can be set up as a one-time payment or as a recurring payment, such as a subscription or a payment plan.
Create a Product
- Go to Payments > Products and press the + Create New Product button in the top right corner.
- Under the Product Information tab, add a product title.
- Under the Pricing tab, set whether it is a one-time charge or recurring (used for subscriptions and payment plans) and enter the amount.
- To add additional prices, click on the + Add Another Price button and enter a pricing name.
- Press Save.
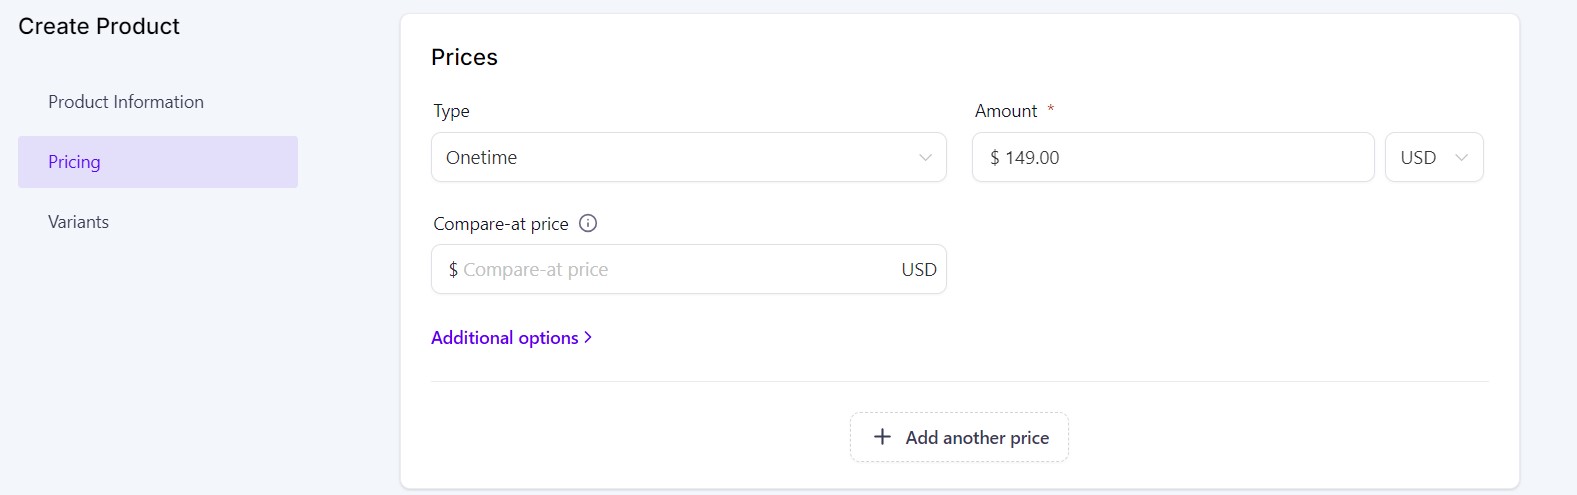
The one thing you may want to set is Tax, if you need to include tax in the price. If you are selling through a payment link, you can also add a description and an image, which appear on the payment link itself.
You do not need to set the collection, define variants or add search engine listings to your products. These are for online store products only.
Add Additional Pricing Options
Once the product is created, you can add additional prices, if required.
- Go to Payments > Products and select the required product.
- Under the Pricing tab,Click on the + Add Another Price button.
- Enter a pricing name, payment type, amount and currency for the additional price. If required, expand the Additional Options drop-down and add a price description. You can also toggle on Membership Offer to mark the product as a membership offer.
- Press Save to save and exit.
Edit a Product or Price
- Go to Payments > Products and select the required product.
- To edit the product details, click on the Edit button in the top right corner of the Details section.
- To edit or delete a price, select with the pencil icon or the trashcan icon next to the price. If you select the trashcan icon, you will need to type 'delete' in the popup and then press the Yes, Delete button to confirm.
Products Dashboard
Product Dashboard
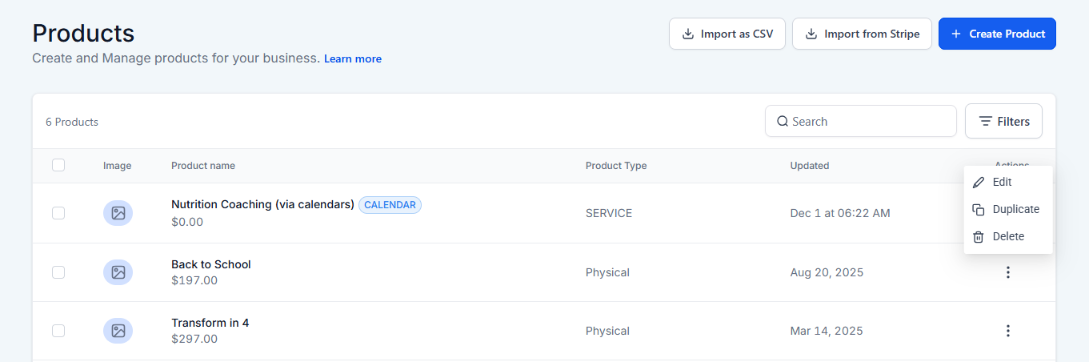
Go to Payments > Products to view existing products, including product name, price and type. There is also information on when the product was last updated.
Ellipsis Menu Options
Click on the ellipsis menu (⋮) in the Actions column to view available options. These include Edit, Duplicate and Delete. Once you select an option, follow the on-screen instructions.
Receipts
Sales Receipts
To enable sales receipts, go to Payments > Settings > Receipts and toggle on Enable Sales Receipts. You can customise the emails for adding a title or selecting an email template. Press Save when complete.
Transactions
Transactions Dashboard
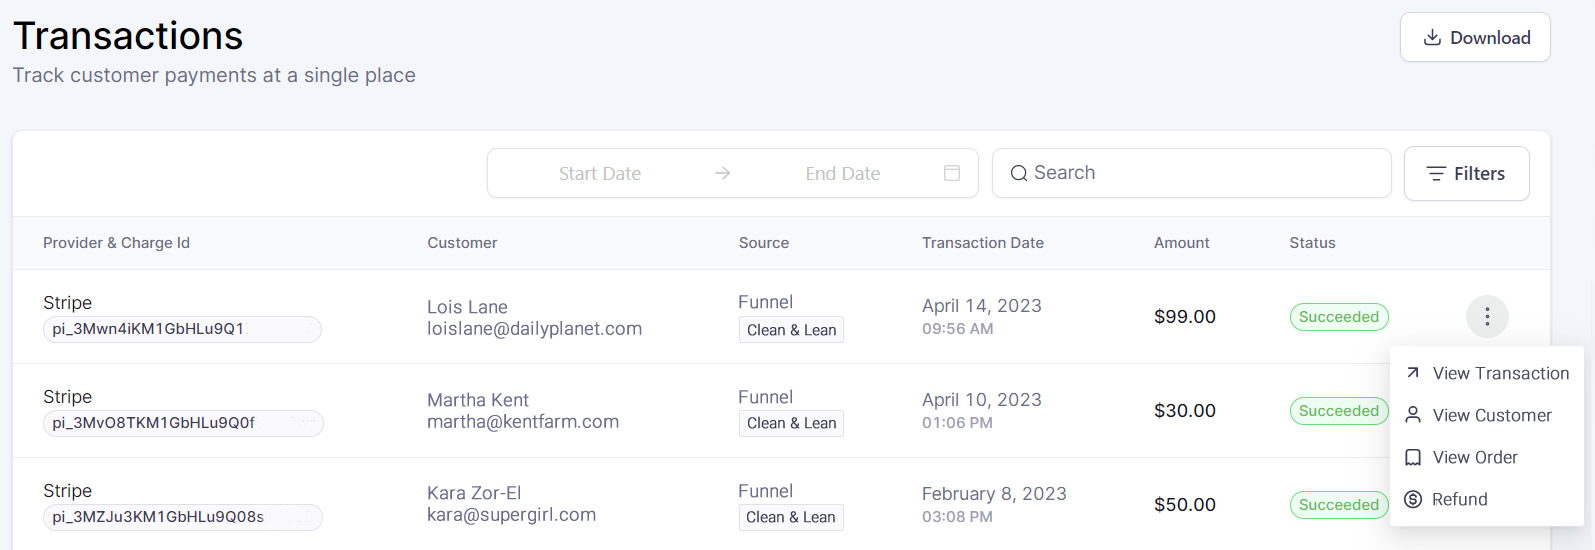
To view customer payments, go to Payments > Transactions. Here you can see information on the customer, source, transaction date, amount and status. You press Filters to filter by status, payment mode or source type. You can also filter by start and end date.
Download
To download a list of transactions (as a CSV file), first filter the transaction list as required and the press Download.
View Transaction
To view additional details for a specific transaction, click on the ellipsis menu (⋮) and select View Transaction.
View Customer
To view the contact card for the customer of a specific transaction, click on the ellipsis menu (⋮) and select View Customer.
View Order/Invoice
To view the order or invoice (depending on the type of transaction), click on the ellipsis menu (⋮) and select View Order/View Invoice.
Refunds
Refunds
To refund a specific transaction, click on the ellipsis menu (⋮) and select Refund. Choose the amount (and add a note if required) and press Refund.
Audit Logs
To view refund actions, go to Settings > Audit Logs and set the module filter to Payments (or Invoices). Logs will capture successful full/partial refunds as well as failed refunds. The details will capture the refund status, notes, the business user who performed the refund, type of refund along with other details.
Subscriptions
Transactions Dashboard
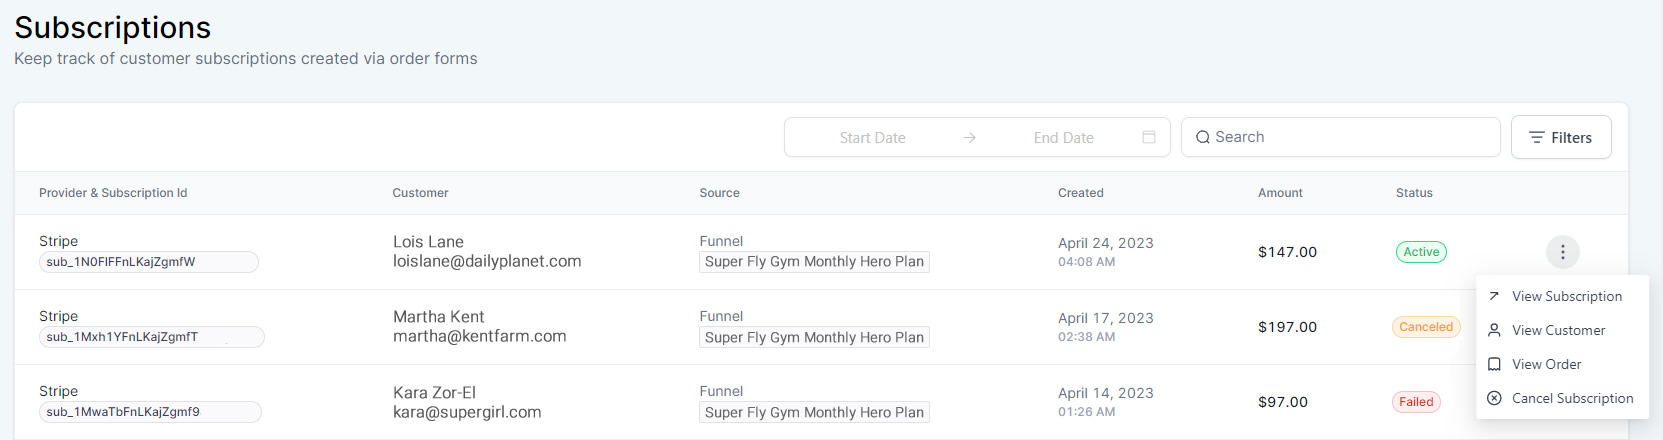
To view subscriptions, go to Payments > Subscriptions. Here you can see information on the customer, source, date created, amount and status. You press Filters to filter by status, payment mode or source type. You can also filter by start and end date.
View Subscription
To view additional details for a specific transaction, click on the ellipsis menu (⋮) and select View Subscription.
View Customer
To view the contact card for the customer of a specific transaction, click on the ellipsis menu (⋮) and select View Customer.
View Order/Invoice
To view the order or invoice (depending on the type of transaction), click on the ellipsis menu (⋮) and select View Order/View Invoice.
Manage Subscriptions
Cancel Subscription
To cancel a subscription, click on the ellipsis menu (⋮) and select Cancel Subscription.