
Team Dashboard
Team Management Dashboard
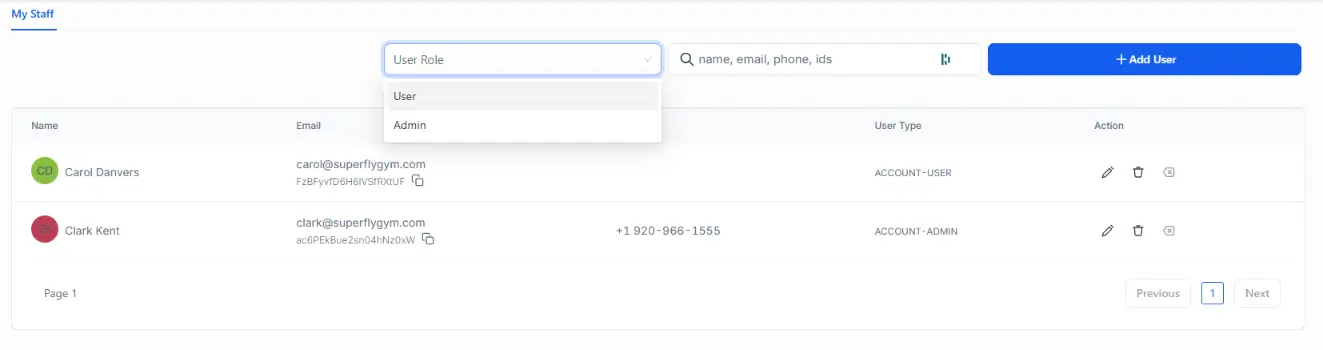
Go to Settings > My Staff to view team members. You will see their name, email, phone number, and user type. You can filter by user role and search for a team member (by name, email or phone).
Edit Team Member
To edit a team member, click on the Pencil icon. Press Save when you have finished.
Delete Team Member
To delete a team member, click on the Trashcan icon. Press Save when you have finished.
Add Team Members
Add Team Members
- Go to Settings > My Staff and click on .
- Under User Info, enter their name and email, and assign them a secure password. If that team member is customer-facing, it is best to set them a company-related email.
- Under User Permissions, toggle on the features that you want them to have.
- Under User Roles, select user or admin.
- Press Save.
Each team member will need to follow the steps on the Getting Started page to complete their profile and calendar. They need to log in to their own account, go to Settings > Integrations. On the Google account, they need to click on Add another account.
User Permissions
User Settings
Open a team member and you will see six menus down the left hand side.
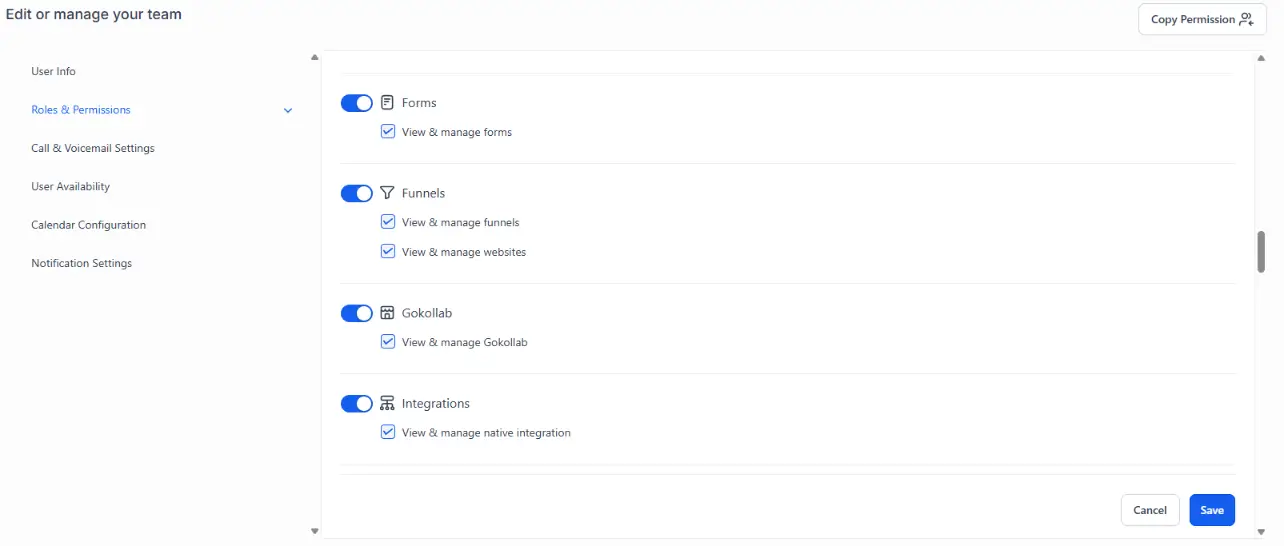
- User Info – Their name, email and phone number, and the calendar connected to their account.
- Roles & Permissions – Whether they are a user or an admin, and everything they can reach. Every part of the software can be switched on or off here: AI agents, account settings, tools, automations, calendars, communities, contacts, conversations, forms, funnels, integrations, marketing, media storage, memberships, opportunities, orders, payments, products, QR codes, the dashboard, reputation, subscriptions, surveys and transactions. Each has a toggle, and under it the things that team member can do.
- Call & Voicemail Settings – If you have more than one number on the account, assign them the one they should use.
- User Availability – The hours they have set for themselves.
- Calendar Configuration – The calendars they have connected and the conferencing they use.
- Notification Settings – How they hear about activity on the account. In-app notifications appear on the orange bell in the top right of the screen and in the LeadConnector app. You can also switch on email and SMS, but these come out of your own account allowances and billing, so every text sent to a team member is charged to you.
An admin can open these settings for any team member, admin or user. A user only sees their own.
Copy Permission
If a team member already has the permissions you want, copy them across instead of setting every toggle again.
- Open the team member you are setting up.
- Click in the top right corner.
- Select the team member you want to copy from in the dropdown.
- Click .
Permissions copy from the team member you pick to the one you have open, never the other way round.
User Roles
User Roles
Team members can be set as admin or user. Only admins have the permission to edit/create/delete team members, edit business info settings, select users on task lists, see other user’s conversations, remove tags, delete and import contacts, export opportunities, and access reporting.
Be aware that an admin can change your account settings, your business information and your team, including removing you. Set each team member as a user unless they need to run the account.