Funnels
You can use the funnel builder to create funnels for landing pages, lead magnets, and sales pages. You can create pages with a variety of elements such as pop-ups, forms, payment forms, calendars, surveys, and buttons. You can completely customize each step and each element, including fonts, colors, borders, shadows, and spacing.
Create a Funnel
Create a Funnel
- Go to Sites > Funnels . Click the green + New Funnel button to create a new funnel.
- Add a funnel name and click Create Funnel .
Create a Step/Page
Once you create a new funnel, you have to add a step. Each step is an actual page.
- Click on + Add New Step.
- Add a page name and path, and click Create Funnel Step.
- You can then either choose Create from Blank if you want to start a page from scratch or choose Import to a step from another funnel in your account.
Click Funnels Pages
You also have the option here to import an existing ClickFunnels page when create a new step. Paste the link from the funnel step you want to import (starting https://) and allow a few moments for the import to complete. After it loads, you can see what’s been imported and make any changes within the builder. You will need to add new forms and order forms.
Edit a Step/Page
- To edit a step, click the yellow Edit button.
- Select either Edit Page to edit the page in the same window or Edit in a New Tab to edit the page in a new browser tab.
Preview Step/Page
To preview the page, click the Preview Page icon.
Clone a Step/Page
- To clone an existing page, click on Clone Funnel Step.
- To copy the step in the same funnel, click on Clone Step in This Funnel on the left-hand side of the pop-up window to make a copy. To copy the step to another funnel(s), on the right-hand side of the pop-up window, select your location and the funnel(s) you want to copy it to and click on Add Step to More Funnels.
Delete a Step/Page
To delete a page, click Delete Funnel Step.
Type the phrase DELETE into the box and press Yes, Delete. You can also press Cancel, Keep to cancel.
Page vs Step URLs
Page vs Step URLs
One thing that sometimes causes confusion is the step URL vs the page URL. For each step, you can create two pages for the purposes of A/B testing. Each page needs their own URL. This is the URL that clients will see as they move through the funnel. The slug for pages can be changed by clicking the Cog icon below the page thumbnail.
The step URL is where you would send someone if you need to send them directly to a step. However, the URL you would normally share would be the URL for the entire funnel (which you created in Settings > Domains).
Funnel Dashboard
Funnel Dashboard
Go to Sites > Funnels . You can view a list of your existing funnels here or click the green + New Funnel button to create a new funnel. If you create a new funnel, add a funnel name and click Create Funnel .
Once you create a new funnel, you have to add a step. Each step is an actual page.
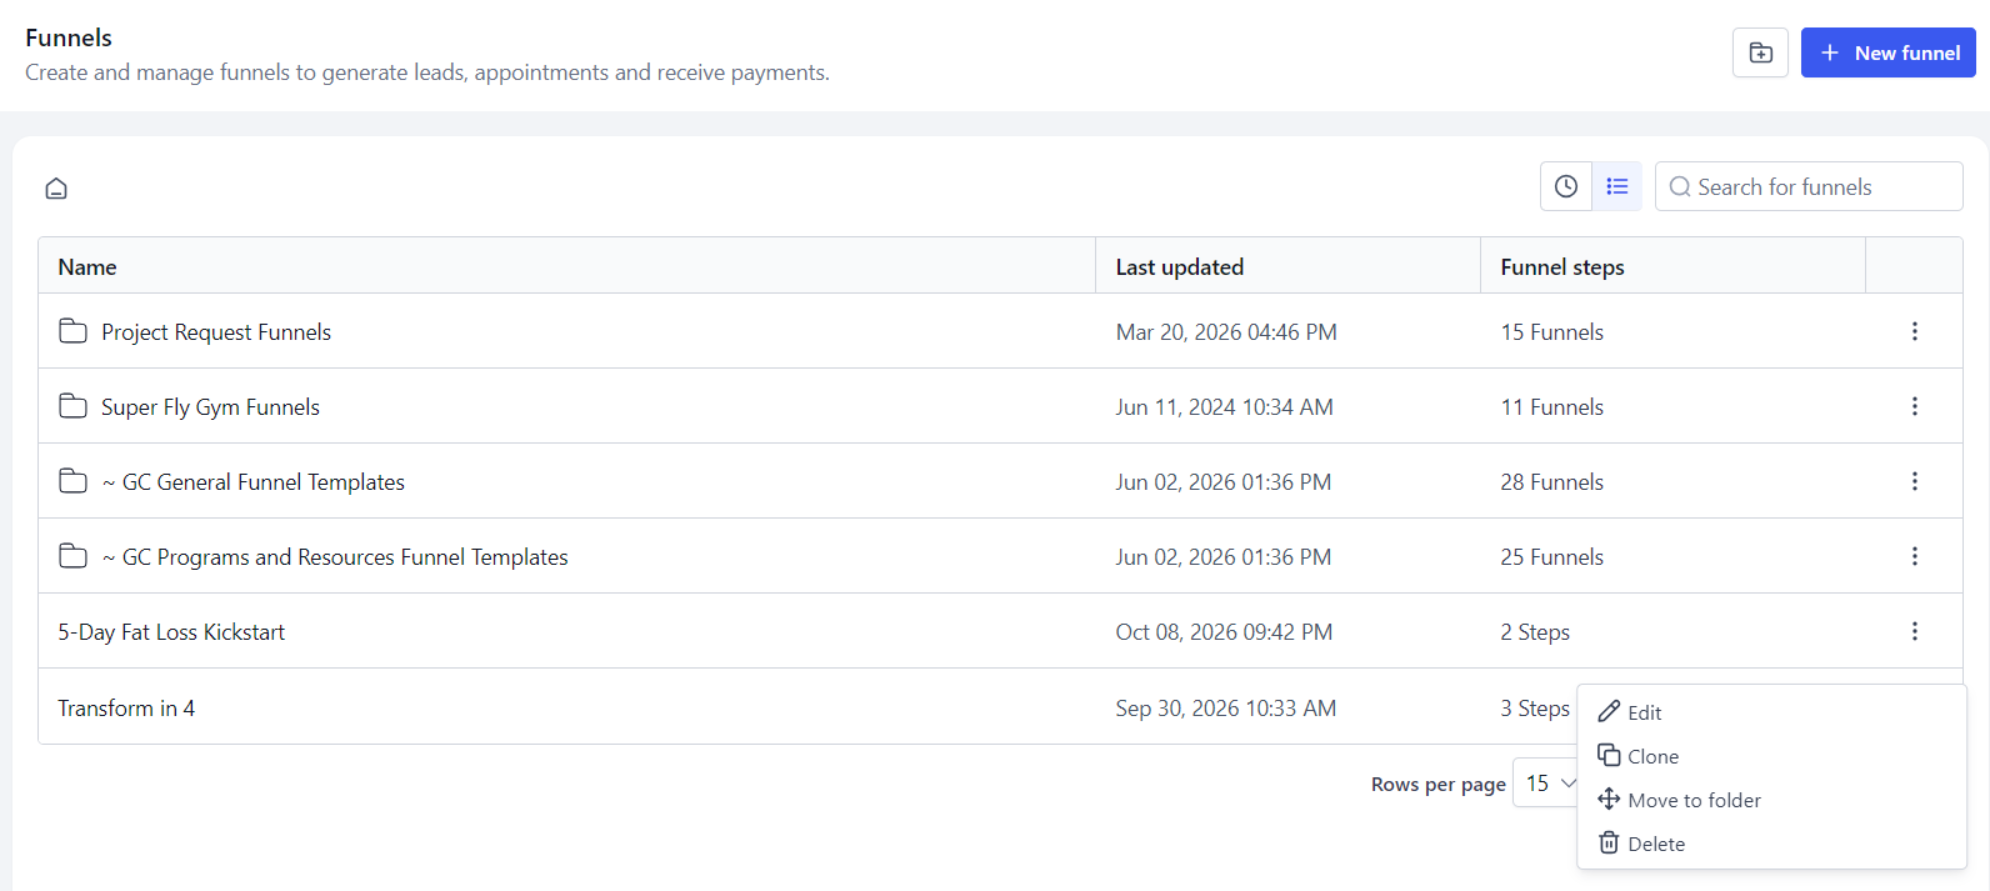
Ellipsis Menu Options
Click on the ellipsis menu (⋮) next to a funnel to view available options. These include Edit, Clone, Move to Folder and Delete. Once you select an option, follow the on-screen instructions.
Funnel Folders
Funnel Folders
You can use folders to keep your funnel organized. From the funnel dashboard, click New Folder. Give the folder a name and press Create Folder. To rename or delete a folder, click the ellipsis menu (⋮) and select the required option.
Funnel Stats and Settings
Funnel Builder Tabs
After you have created a new funnel or clicked on an existing funnel, there four different tabs to set up your funnel (Steps, Stats, Sales and Settings).
- Steps – View all your funnel steps/pages. There are three tabs for Overview (to edit or preview your funnel steps), Products (to view or create products associated with the funnel page), and Publishing (where you can update the step name and path also known as the slug).
- Stats – View the statistics for each step in your funnel including page views, opt-ins, sales, and earnings per pageview for a selected date range.
- Sales – For older funnels (version 1), this tab allows you to track any transactions that have happened within a selected date range. For newer funnels (version 2), go to Payments > Transactions.
- Events - Send tracking events data to Meta. Click here for more information about Meta events.

Funnels Settings
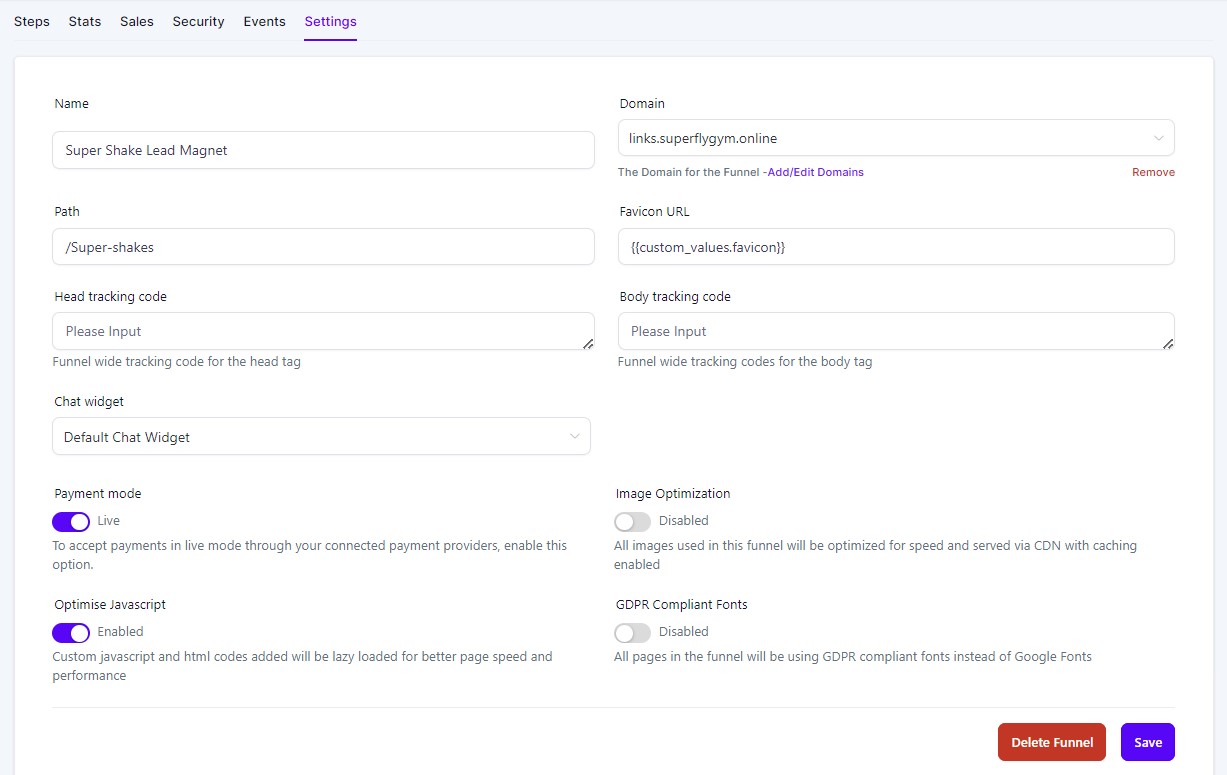
Update the name and path, connect a domain, add a favicon URL, change the payment mode, and select a chat widget. You can also include Head and Body Tracking Code (scripts that run on each funnel step, such as chat widget and analytics).
Add Domain
To add an existing domain to the funnel, select the domain from the dropdown menu in the funnel settings and press Save.
Click here for more information about creating a new domain.
Add a Favicon
A favicon is also known as a tab icon, URL icon, bookmark icon, and more. It is an image file containing one or more icons associated with a particular site or page. To add a favicon, paste your favicon URL into the funnel settings. You can also use the custom value (see above image) to add your default favicon.
Add Chat Widget
To add the chat widget to your page, open the drop down list and select the required widget. You can preview the funnel or website, and refresh the page to view what the widget will look like for contacts visiting your funnel/website page.
Click here for more information about editing the chat widget.
Image Optimisation
You can also toggle on Image Optimisation to optimise images for better loading speed.
Click here for more information about image optimization.
Tracking Code
You can add tracking code to your funnel by adding code to either the Header Tracking Code box or the Body (Footer) Tracking Code box, as required by the third party tool.
Analytics
A/B Page Testing
You can create two pages in order to test the copy and/or design of your landing pages.
- Go to Sites > Funnels. From the list, click on an existing funnel and go to the step that you want to split test.
- Click + Create Variation and choose whether you want to duplicate the existing page (Create a Duplication Variation) or start from scratch with a completely new page (Create from Blank). If you have pressed this in error, click on the cross in the top left-hand corner to close the window.
- Click Edit Page to make changes to the variation page. There are also options to Preview Page and Delete Page. After making the required changes to the variation page, press Save.
- Using the slider, choose the percentage split of traffic that you want each page to receive. Press Start Split Test to complete the set-up. You can choose to split-test using multiple domains.
- You can access performance statistics from the same dashboard.
IMPORTANT! This will change the link of the funnel from mywebsite.com/page to mywebsite.com/s/page. You will need to direct traffic to this new link.
Analytics
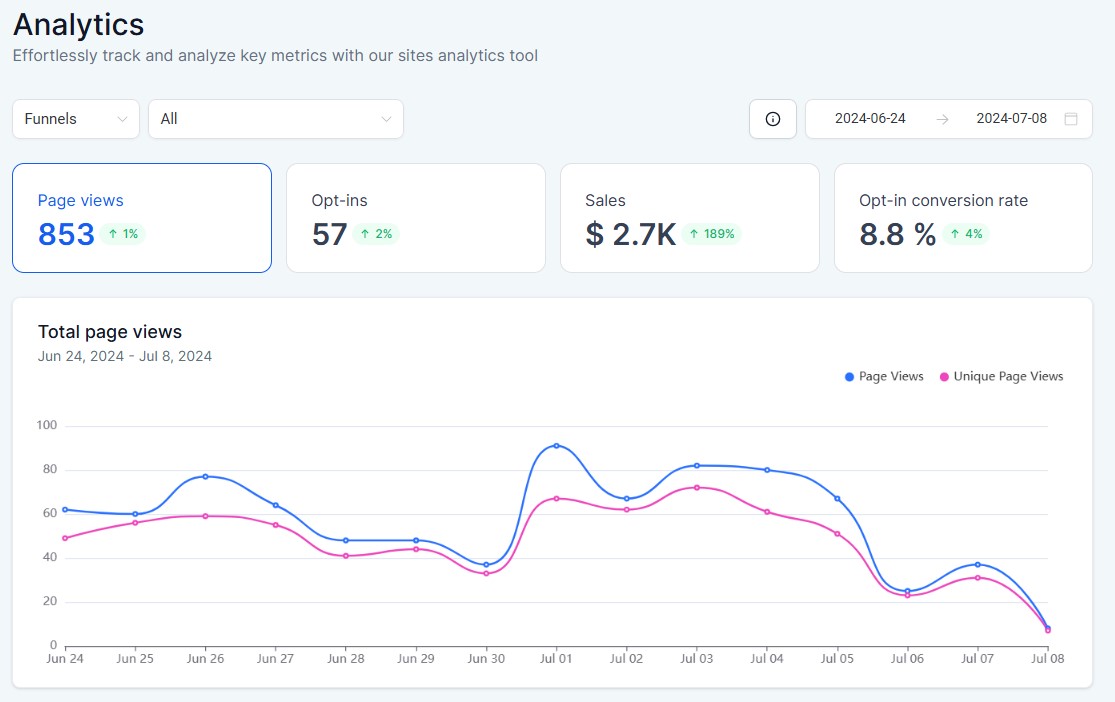
In addition to the statistics found in Settings for an individual funnel, you can also track and analyze key metrics in Sites > Analytics. You will can filter by type (funnels or websites), by funnel name and by date.
The page will give you information about overall page views, unique page view, opt-ins, sales and opt-in conversion rate.