Once you are comfortable building a workflow, these are the parts of the builder you reach for next: narrowing a long list of workflows, controlling how and when a workflow runs, checking what it actually did, and branching the path a contact takes.
Workflow Dashboard
Advanced Filters
Click on Advanced Filters in the top left corner to narrow down the list. You can filter by workflow name, status, trigger type, action type, updated by, tags, and created on.
Filtering by trigger type or action type lets you find every workflow relating to one part of the system, such as calendar appointments, purchases, or forms. Filters can be combined using And or Or to narrow the list further.
Smart Lists
Once you have filtered the list, you can either save it as a smart list or discard the changes. Saved smart lists appear as tabs along the top of the page, alongside All Workflows, Needs Review, and Deleted. To rename a list, change its filters, or delete it, click Customize List in the top right corner.
Workflow Settings
Workflow Settings Tab
Once you have set up the workflow, click on the Settings tab. If you want the contact be able to go through the workflow more than once (or you are testing a workflow), ensure Allow Multiple is toggled on. If your workflow contains email steps, you can complete the Sender Address information here (which means you won't need to add it to each Send Email step).

Contact Workflow Settings
- Allow Re-entry– If Allow Re-entry is toggled on, the same contact can re-enter the same workflow once it has left this workflow. If the contact attempts to re-enter while it is still enrolled in this workflow, it will get skipped. Also if this workflow has appointment or invoice based triggers it will allow contacts to re-enter even if the 'Allow re-entry' setting is disabled.
- Stop on Response – If Stop on Response is toggled on, the workflow would end if the contact responds to a message that is sent from this workflow.
Communication Workflow Settings
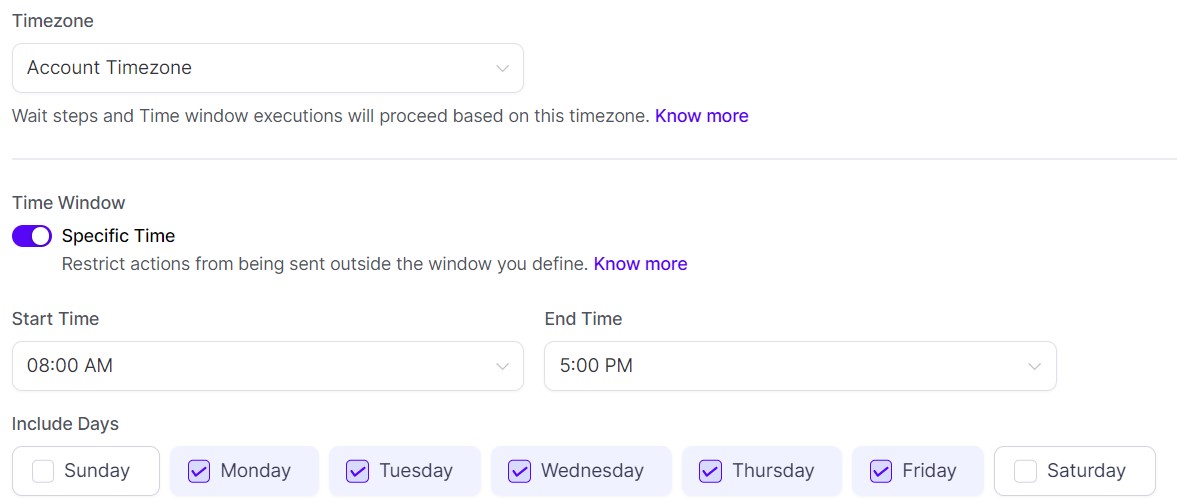
- Timezone - Choose whether you want the wait step and time window executions to be based on the Account Timezone or Contact Timezone.
- Time Window – If you want to restrict actions from being sent outside the window you define, toggle on Specific Time. From here, you can customize days and start and end times. When selected, actions will only execute if they fall within the specified time window; they will wait for the next available window if they are outside. Wait steps can schedule for outside of the window, but the next action will only fire inside of it.
- Sender Address – Gives your emails a default from name and from email address. You can override this by setting from name and from email in the email actions themselves.
- Mark as Read – If Auto Mark as Read is toggled on, conversations will show up in the ALL tab as read (rather than going straight to the unread tab).
Workflow Enrolment History Tab
Enrolment History Tab
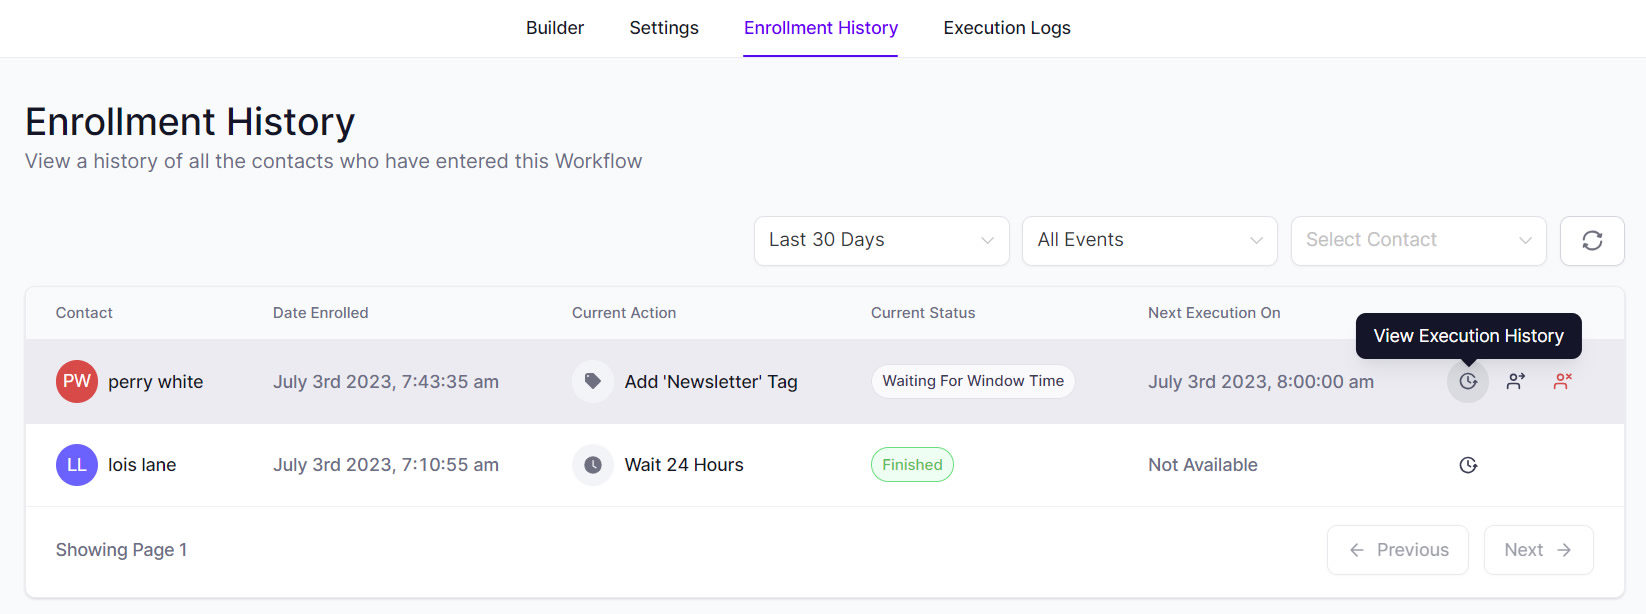
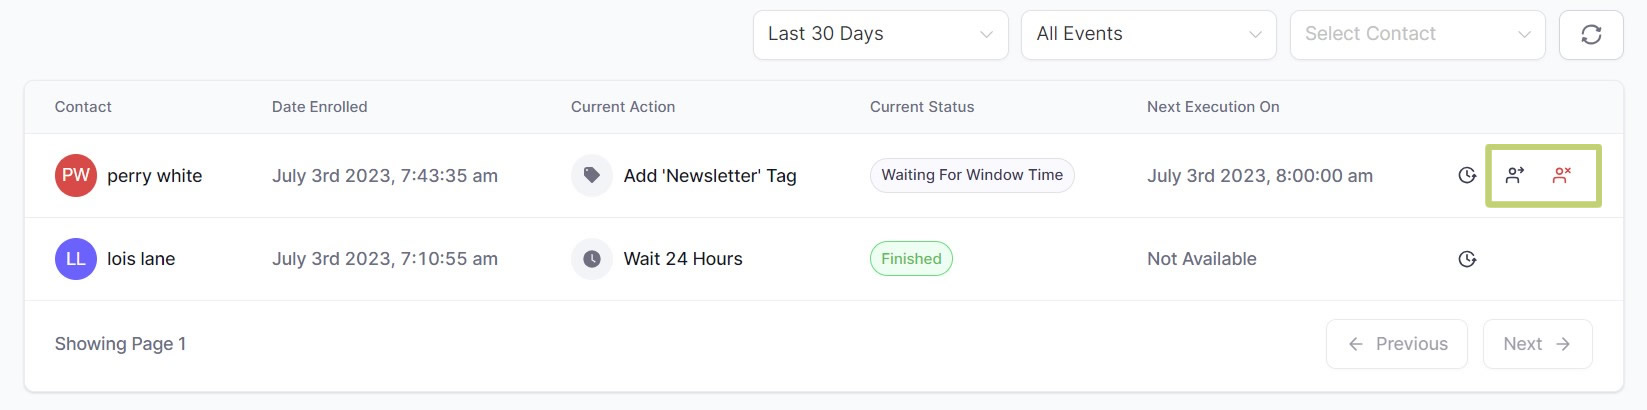
The Enrolment History tab will show you history of all the contact who have entered the workflow. You can filter by date, event and contact name. You can see the date enrolled, the current action, current status and when the next action will execute (if applicable).
To see the full execution log for a specific contact, click on the History icon in the right hand column.
Workflow Execution Logs Tab
Execution Logs Tab
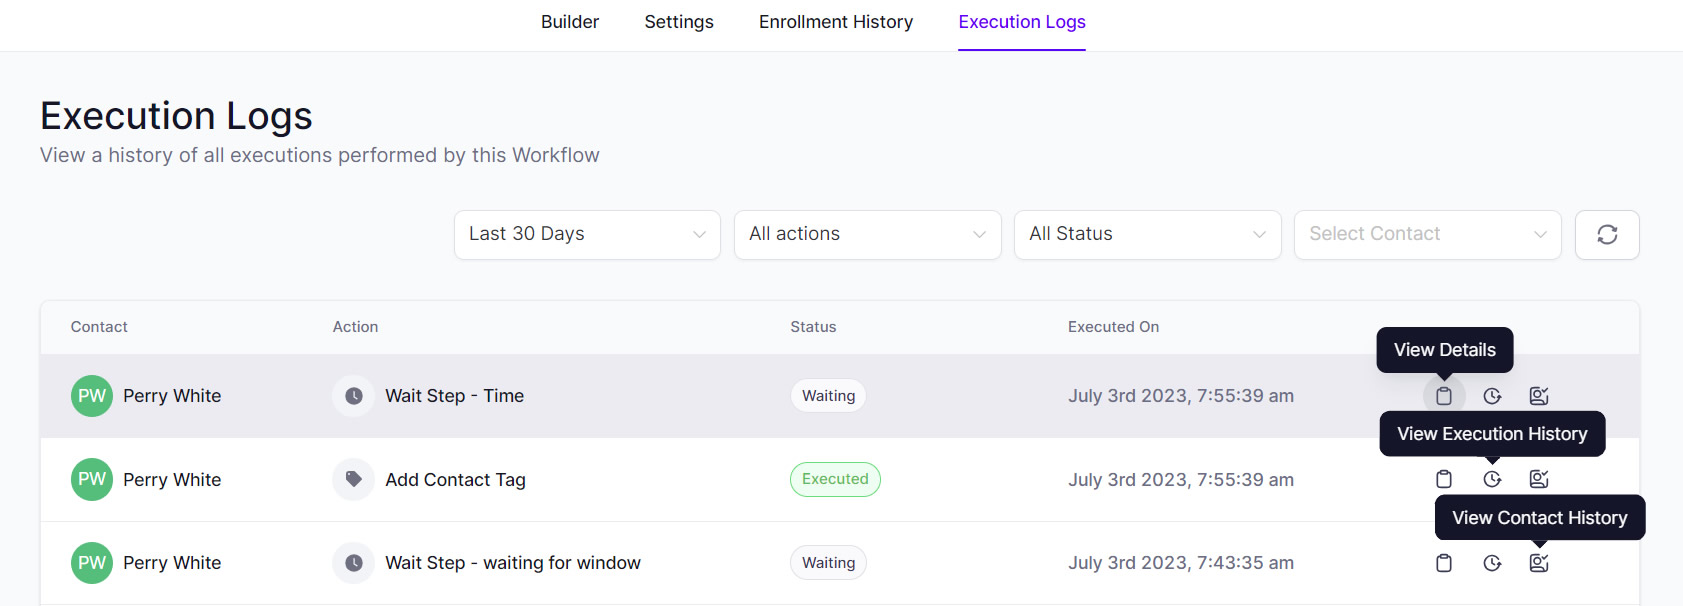
The Execution Logs tab will show you a complete breakdown of all completed actions by all contacts. It gives you information about the contact and which actions have been completed (and when).
The status column will show whether the action was successful (executed), skipped, or unsuccessful (failed). For wait steps, it will show whether the contact is waiting or whether the wait has ended.
If an action step has been skipped or failed, you can click on the Clipboard icon it the right hand column to find out more.
Push or Delete
There may be instances where want to speed up a workflow and bypass wait step for a contact. For example, you may want to test the workflow steps instantly for yourself, without waiting for the scheduled wait step.
Force An Individual Contact to the Next Step
To force an individual contact to the next action step in the workflow, go to the Enrolment History tab and click on the Push Contact icon in the Actions column.
Delete An Individual Contact
To delete an individual contact from the workflow, go to the Enrolment History tab and click on the Delete Contact icon in the Actions column.
Push/Walk All Wait Step Contacts to the Next Step
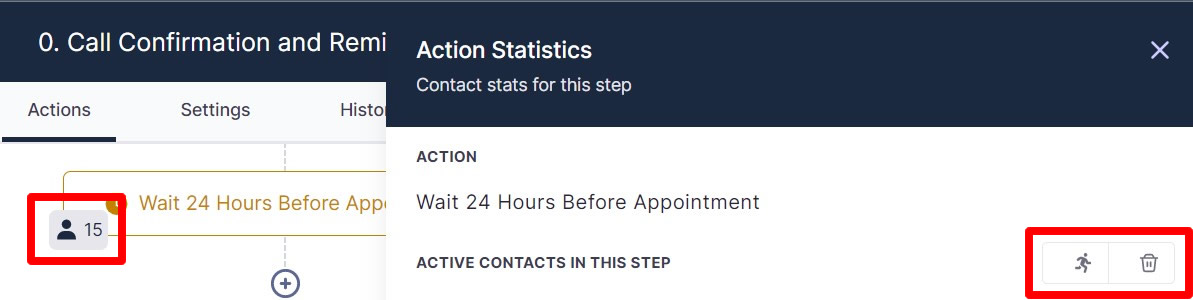
To force all contacts on a particular wait step to the next action step in the workflow, click on the contact count in the bottom left corner of the wait step and click on the Walk icon in the right-hand panel.
Delete All Contacts from a Specific Step
To delete all contacts from a workflow that are on a particular wait step, click on the contact count in the bottom left corner of the wait step and click on the Trashcan icon in the right-hand panel.
Logic, Conditions and Formatting
If Else Condition
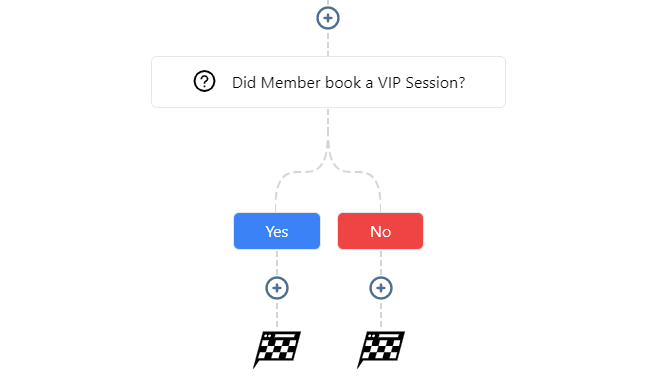
The If/Else workflow condition allows you to take different paths, or chains of events, depending on specific conditions within the workflow. You can specify the path based on contact details, date/time, contact reply, or trigger, you can set up the various paths. For example, you may want the workflow to send people with a certain tag down one path, and people from another tag down another path. You can further customize the if/else conditions to include several filters if you wish.
Go to
The Go-To event allows you to jump from one part of a workflow to another. If you have an If/Else step in the workflow, you can jump from one branch to another if the second branch starts to duplicate the steps of the first branch. You can also use it to create a loop.
- Add a Go To action step at the end of a branch and press Save Action.
- A glowing green dot will appear on the Go To step and dark green dots will appear on all the other steps.
- Either hold and drag the glowing dot to the required step or just click on the dark green dot on that step.
Goal Events
A Goal Event watches for one action and moves the contact straight to a chosen step the moment it happens, wherever they had reached in the workflow. The condition can be an appointment booking, a tag added, a tag removed, or a form submission.
Use one where the action makes the rest of the sequence unnecessary. A contact who books the call does not need the three reminders that follow it, so a Goal Event set on the booking takes them to the confirmation step and skips the rest.
Math Operations
The Math Operation action step allows you to perform arithmetic calculations (add, subtract, divide and multiply) to a numerical field or date field. This might be useful for updating a Lead Score based on contact actions or starting a contact on a Coach Catalyst program a certain number of days after they have joined.
- Click the + to add a new event to the workflow and select Math Operation.
- Select either a standard field (such as current date or date of birth) or select a custom field from the dropdown list or search for the field by name. Click here to learn more about creating custom fields.
- If the field is numerical, select the operation (add, subtract, divide or multiply) and enter a value. If the field is a date, select the operation (add subtract) and enter a time period.
- Choose the field to be updated. This might be the original field or a new field.
- Click Save Action.
Email and Message Statistics
Stats View
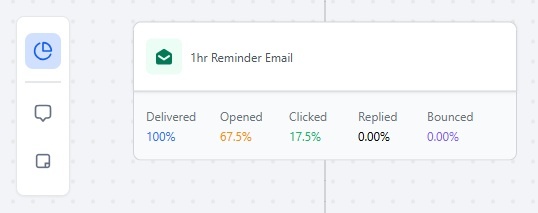
Click on Stats View in the left-hand panel to open the statistics panel under all emails and messages within the workflow. This provides a clear overview of email performance and engagement.
Statistics Tab
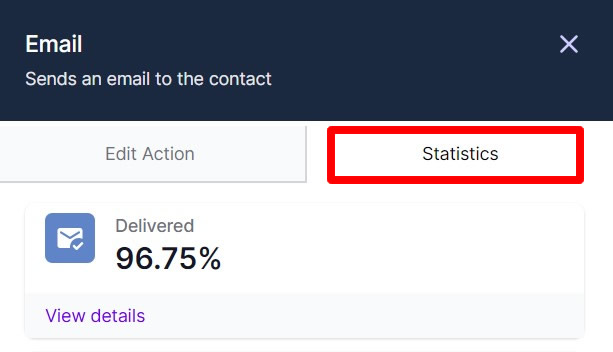
Click on email or messaging action in the workflow and click on the Statistics tab in the right-hand panel to see statistics for delivered, opened, clicked, and replied.
You can click View Details for more information and click the tabs at the top of the popup window to change between the information. Next to each name, there is an open icon that you can click to jump to the relevant contact details page.