
Workflows are a visual builder that automate tasks (or a sequence of tasks). Once you get the hang of workflows, the possibilities are endless!
Create a Workflow
Workflow
- Click the blue + Create Workflow button in the top right of the screen.
- Choose an option for the type of Workflow you wish to create. To create a blank workflow, select Start from Scratch. You can also choose from pre-existing ‘recipe’.
3. At the top of the page, you can rename a workflow using the pencil icon next to the title.
By default, you’ll be on the Builder page. You can click to toggle between Builder, Settings, Enrolment History, and Execution Logs tabs.

NOTE: The system will allow you to have duplicate workflow with the same name, but we recommend that you name each one uniquely so as to not get confused, particularly if you need to select the workflow from a dropdown list elsewhere in the system.
Save and Publish
Regularly save your workflow by pressing Save in the top right corner. When complete, toggle the workflow from Draft to Publish mode to activate it.

Workflow Trigger
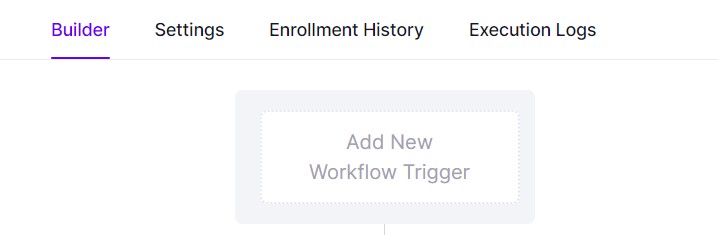
Add New Workflow Trigger
The Workflow Trigger is the event that will initiate the sequence. You can have multiple triggers that fire off the same chain of events. These work on an either/or basis. Note that not all workflow need a trigger (as contact might be added as part of another workflow or might be added manually).
- Click the Add New Workflow Trigger in the grey box at the top of the builder.
- Choose a Workflow Trigger from the right hand panel/menu (or use the search box). There are fifty possible triggers to choose from including appointments, contact information changes, tag changes, form submission, funnel payments and invoice payments, trigger links, messages, membership events, Facebook lead ad and TikTok forms, and video tracking.
- Click Add Filters to customize the trigger filters (for example, if you have chosen Form Submitted, you will need add a filter to specify which form). You may need to add additional filters (for example, if you have chosen Order Form, you will need to add at least two filers to specify the funnel and the submission type).
- Click Save Trigger to add the trigger to your workflow.
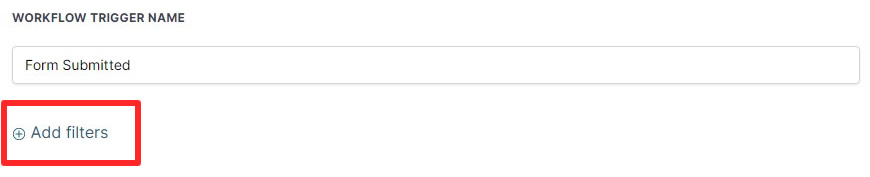
TOP TIP: We recommended renaming the Workflow Trigger Name so that it easier to understand the workflow when you refer back to it at a later date.
Workflow Actions
Workflow Actions
- Click on a + to add a new action to the workflow.
- Choose an action from the right-hand menu. There are fifty possible triggers to choose from including sending texts and emails, updating tags and contact fields, adding contacts to a pipeline stage, granting access to membership products.
- Customize the action in the menu on the right.
- Click Save Action to add the action to your workflow.
We recommended renaming the Action Name so that it easier to distinguish between similar steps and understand the workflow when you refer back to it at a later date.
Action Step Options
Edit An Action Step
To edit an existing action, click the action step and update in the information in the right-hand panel. Press Save Action to close.
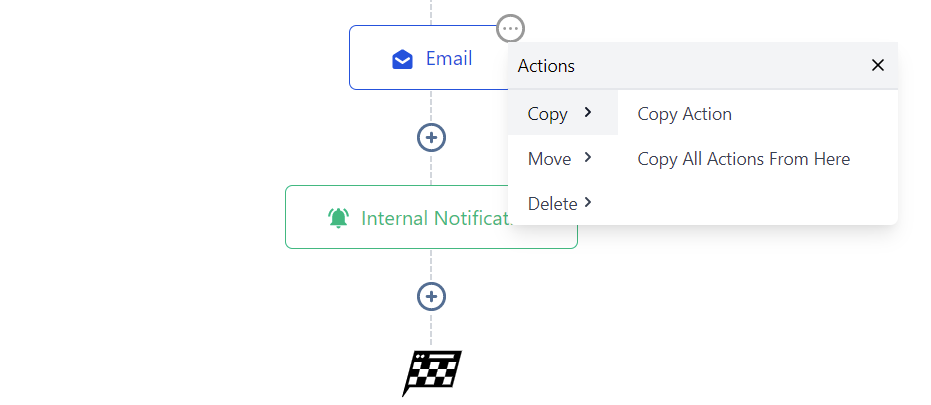
Copy, Move, or Delete an Action Step
Click on the ellipsis menu (⋯) on the action step. From here you can copy, move, or delete that one action, or every action from that point onwards. There is also an option to add Notes to the step.
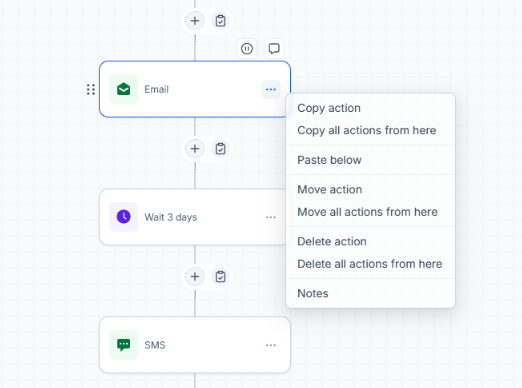
Once you have copied an action, paste points appear down the workflow so you can drop it wherever you want it. A drag handle also appears to the left of a step, so you can drag the step to a new position.
Disable an Action Step
Hover over an action step and select Disable Action. The workflow will skip that step and carry on to the next one, which is useful if you want to stop a single email going out without taking apart the rest of the workflow.
Workflow Dashboard
Workflow Dashboard
Go to Automation > Workflows to go to the Workflow Dashboard page. There is information on when a workflow was created and when it was last updated. There is also information on the workflow Status (published or draft), Total Enrolled (the total number of people who have been added to the workflow), and Active Enrolled (the number of people currently in the workflow).
You can toggle between List view or Recent view by clicking the options to the left of the search box.
You can change page by clicking on Next (or Previous) in the bottom right corner, if you have several workflows.
Stats
The Stats column holds the statistics for that workflow since it was created. Where a workflow contains emails or text messages, it shows how many have been delivered, opened, clicked, replied to, or bounced.
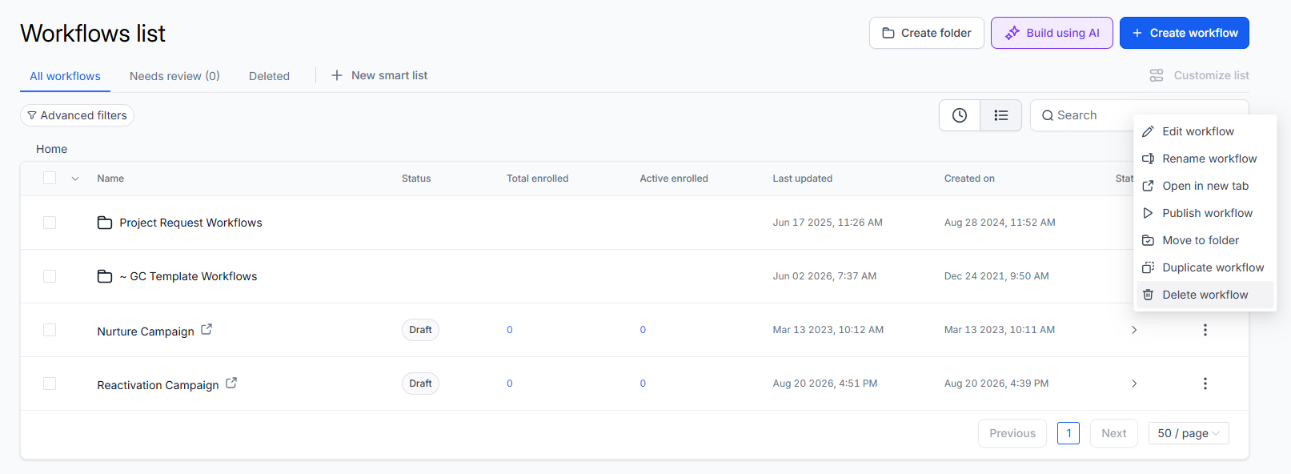
Ellipsis Menu Options
Click on the ellipsis menu (⋮) to view available options. These include Edit, Rename, Open in New Tab, Publish (or Draft) Workflow, Move to Folder, Duplicate, and Delete. Once you select an option, follow the on-screen instructions.
Pause a Workflow
Workflows can be paused and resumed at any time by switching between Published and Draft mode, either from the ellipsis menu or from the toggle in the workflow builder. Pausing temporarily stops the actions from firing until the workflow is republished.
You can also pause multiple workflows temporarily by going to Settings > Automation > Global Workflow Settings. Here you can select which workflows to pause, set the start and end dates, and choose whether the pause should repeat annually. You can add up to 15 scheduled pause dates.
Workflow Folders
Workflow Folders
You can use folders to keep your workflows organized.
- To create a new folder, click the white Create Folder folder button in the top right corner.
- Give the folder a name and press Create.
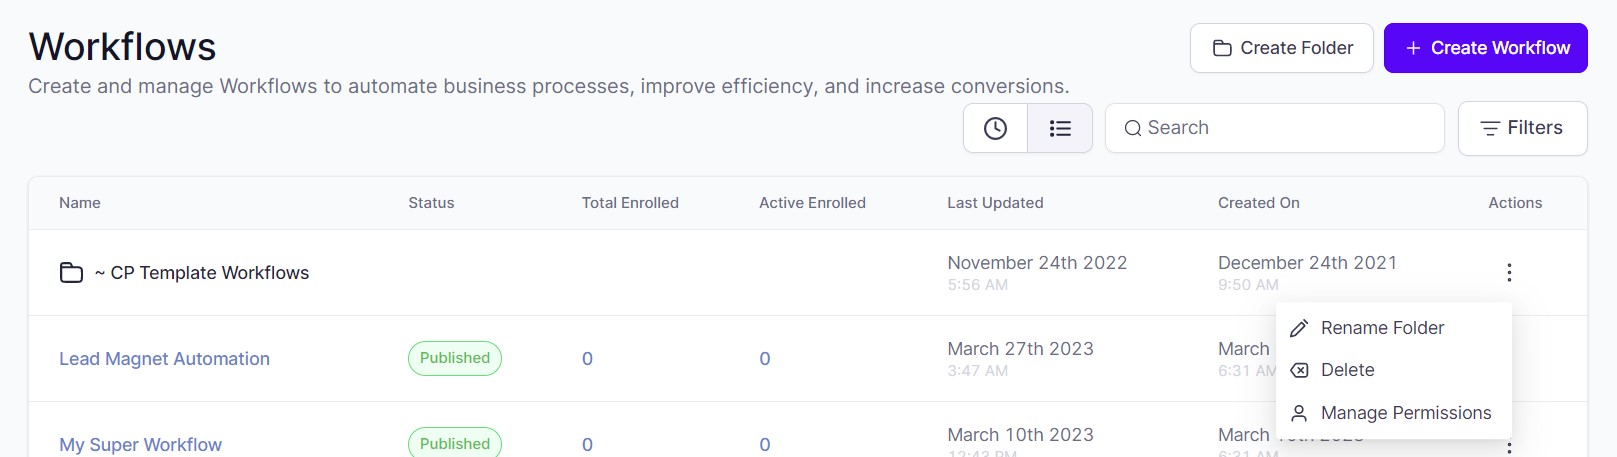
Delete a Folder
To delete a workflow folder, click on the ellipsis menu (⋮) and select Delete. Press Delete to confirm.
Rename a Folder
To rename a workflow folder, click on the ellipsis menu (⋮) and select Rename Folder. Enter the new name and press Rename to confirm.
Move a Workflow to a Folder
To move a workflow to a folder, click on the ellipsis menu (⋮) and select Move to Folder. Select the folder that you want to move the funnel to and press Move to confirm.
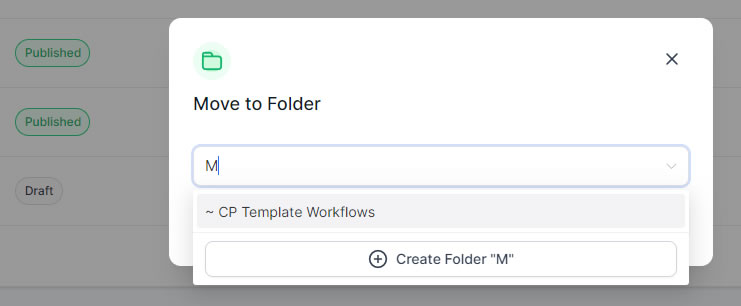
You can also type in the box to search for a folder. If that folder doesn't currently exist, you will be given the option to create a new folder.
Manage Permissions
By default, all account team members who have permissions to access workflows can access to view, create and edit any workflows within any folder. If you want to restrict access of a particular folder to account admins only, click on the ellipsis menu (⋮) and select Manage Permissions. Press Update to confirm.
Click here for more information about general user permissions.
Testing
Testing
Testing a workflow is a simple way to check that everything is working as intended. It’s also a great way to do a quality check on what you’re about to send out as testing will also allow you to see what your contact will receive and check how everything looks.
You can test your workflow by clicking the Test Workflow button in the top right corner. selecting a contact and pressing Run Test, but we recommend testing the workflow by actually doing the action that triggers the workflow.
If the workflow has Wait steps, you can push through the steps.
Click here for instructions on how to push a contact.