
Sequence or Workflow?
Sequence or Workflow?
An Email Sequence is ideal when the emails start on the same date for a set list of contacts, such as a smart list or all contacts. The sequence runs through to the end, with the option of stopping it for anyone who replies.
However, if you want the emails to be triggered or ended by a specific event, such as a lead magnet form being submitted or a purchase, or you want to add other actions, such as adding tags or using if/else conditions, use a Workflow.
Email Sequences
Set the Trigger and Recipients
- Go to Marketing > Emails > Campaigns and select Email Sequences.
- Click + New and give the sequence a name.
- Click Set Sequence Trigger and choose whether the sequence is sent immediately (with a delay, if required) or scheduled for a specific date and time.
- Select the recipients and choose whether to turn on Stop on Reply, which pauses the sequence for anyone who replies and cancels their remaining emails.
Create the First Email
- Click on the first email and add a title. Click Design Email and select either a blank email or one of your templates.
- Add the subject line and complete the additional settings. The sender details set on the first email are used for every email in the sequence.
Add Further Emails
To add the next email, click the + in the left-hand panel. Click Design Email and select either a blank email or one of your templates.
Set the Conditional Sending (when the previous email is delivered, or when a contact opens your previous email) and the Sending Preferences (the minimum delay, preferred time and days to send).
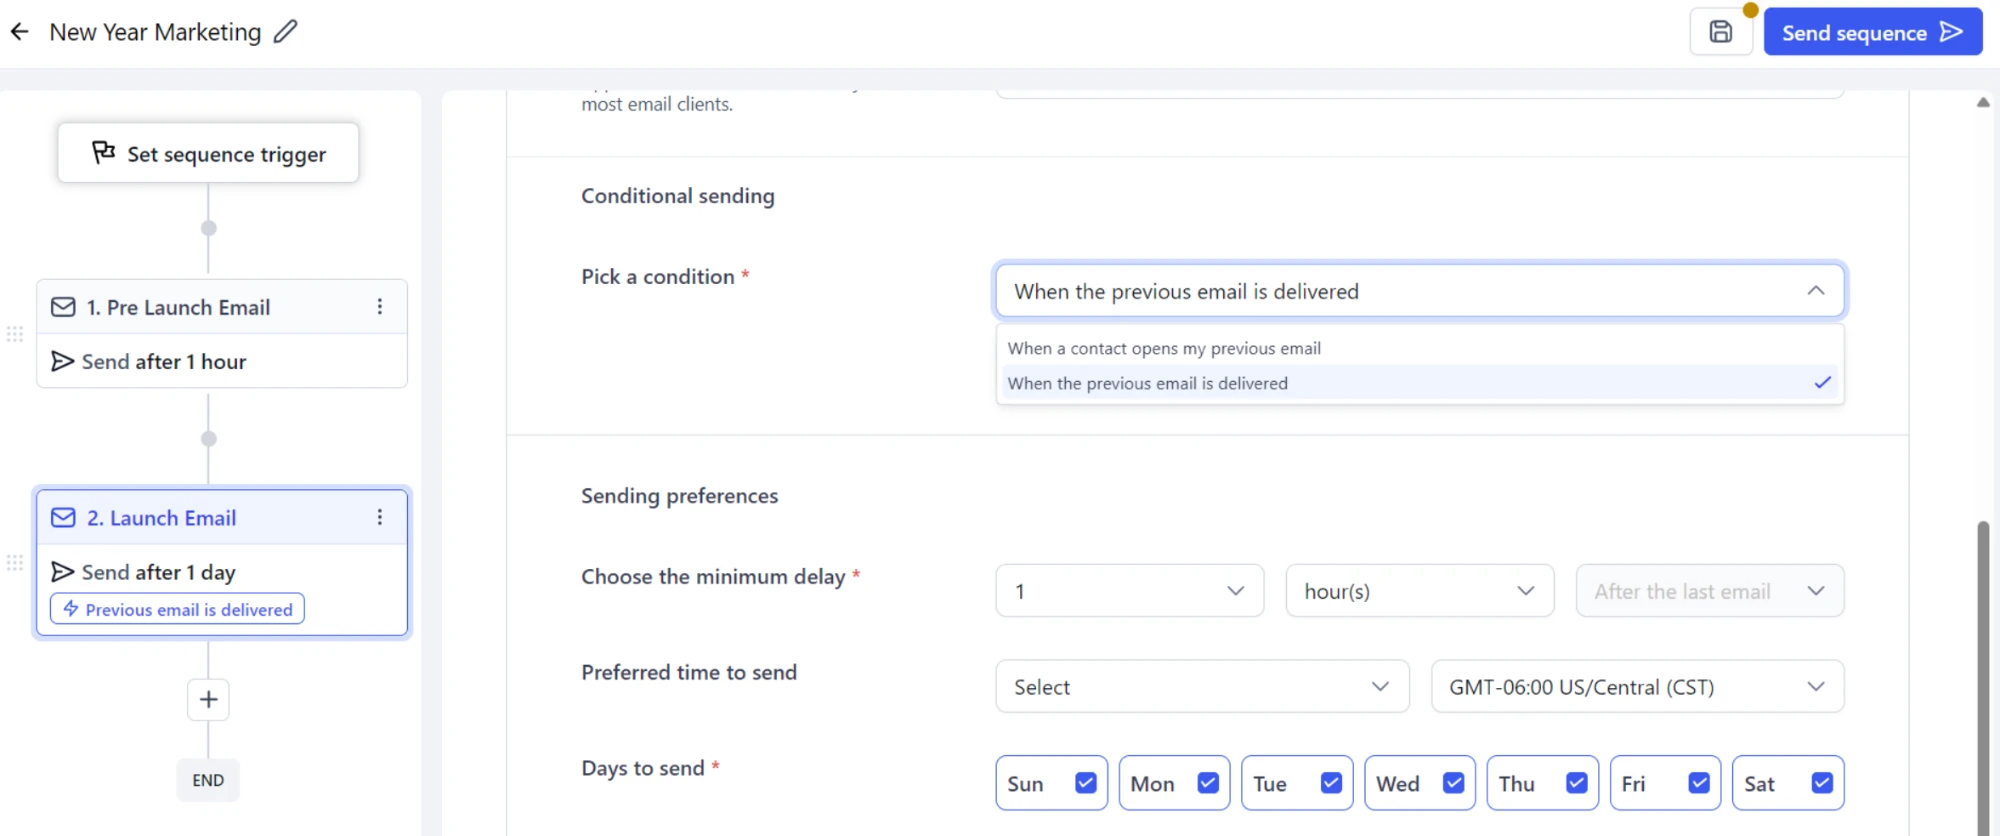
Repeat steps 7 and 8 for each additional email. Use the ellipsis menu (⋮) on an email to clone or delete it.
Send the Sequence
- When complete, click the Save icon to make further edits later, or click Send Sequence.
Workflows
Send Emails from a Workflow
- Go to Automation > Workflows and create a new workflow (or open an existing one).
- If required, add a workflow trigger. You can also bulk add contacts to a workflow in Contacts. Click here for more information.
- Click the + to add a new action to the workflow and choose Send Email from the right-hand menu. Under Templates, choose the required email from the dropdown list or search by name. Press Save Action when complete.
- To create a sequence, add a Wait step, set the delay, and then continue adding emails and wait steps until your sequence is complete.
- When you are finished, toggle on Publish and press Save.
Goal Step
To remove contacts from the workflow once a goal is achieved, such as a purchase, add a Goal step. For example, when a purchase tag is added, the contact is removed from the rest of the workflow.